All posts tagged in Nintendo
 Apr 6, 2020
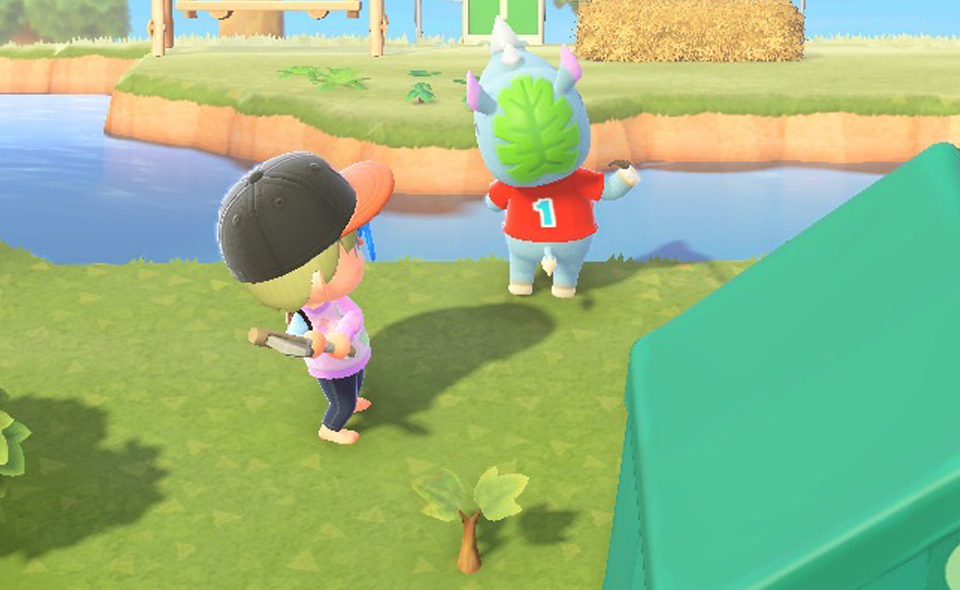
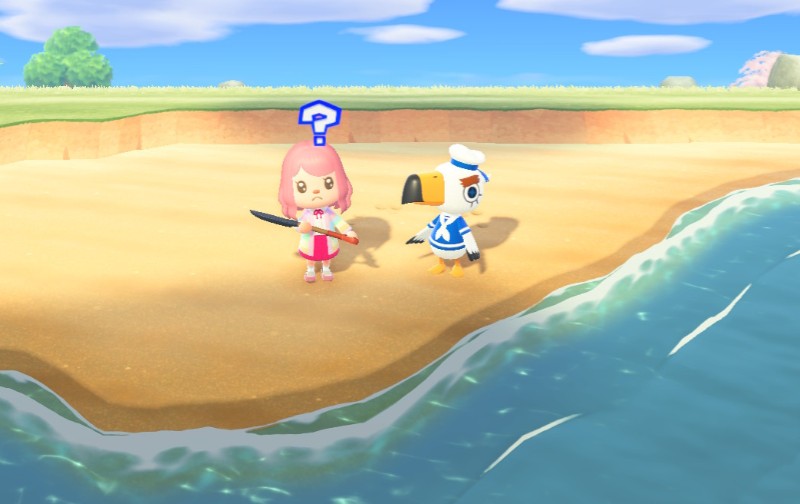
There have been a lot of rumours floating around the internet regarding removing unwanted residents from your island. For example, shoving them and hitting them with nets, and complaining to Isabelle about them. However, as of right now, these are the only two proven methods on how to evict residents in Animal Crossing: New Horizons.
Neglecting Them
Not speaking or interacting whatsoever with the resident you want to leave will eventually make them consider leaving. You’ll know if they’re thinking about leaving as they will have a pondering expression as they walk around and a thought bubble above their head.
It’s important to note that you shouldn’t even hit them with a net, shove them, or send them hate mail as this still counts as interaction. Additionally, make sure to speak with all of the other residents on your island and do any favours they ask of you.
Inviting Other Animals To The Campsite Via Amiibo
The next method will require you to have the maximum amount of residents living on yout island (10). This will be a bit further on in the game when you are able to start selling plots of land, have built a campsite and visited Harv’s island to unlock the game’s amiiibo feature.
Once you have 10 residents, head to the Nook Stop terminal in Residents Services, and scan the amiibo card of the character you’d like to move in. You can also just keep checking the campsite, but you may be waiting a while and there’s no guarantee the camper will be someone you want living on your island
If you’ve opted for the amiibo method, head to the campsite after scanning your desired amiibo card. They may ask you to craft DIY recipes for them over the 3 days that they will stay.
If you craft these recipes, and keep them happy, on the third day of giving them their desired item, make sure to talk to them lots. Eventually, you will have convinced them to move to your island.
However, they’ll sadly note that there is no room for them on the island, but that they have heard that a resident was thinking of leaving. You will then be able to choose which resident you want to
boot off of your islandsadly say farewell to, so that your amiibo camper can move in.The camper will then negotitate with the rogue resident, who rather conveniently, was thinking about leaving anyway (sure you were bud). The resident will then start packing up to leave, and your camper will be making preparations to move in.
Happy evicting!
- Apr 5, 2020
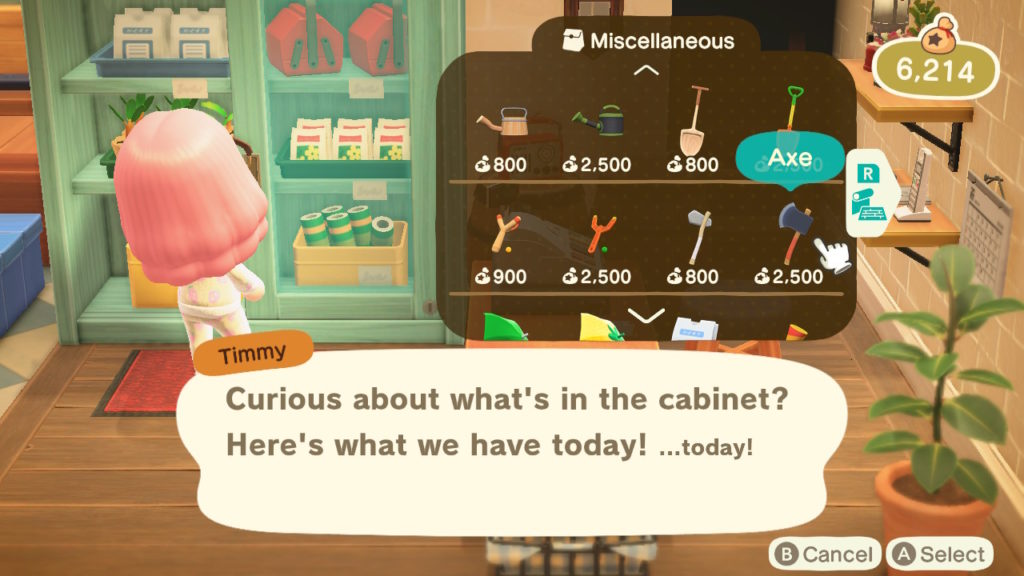
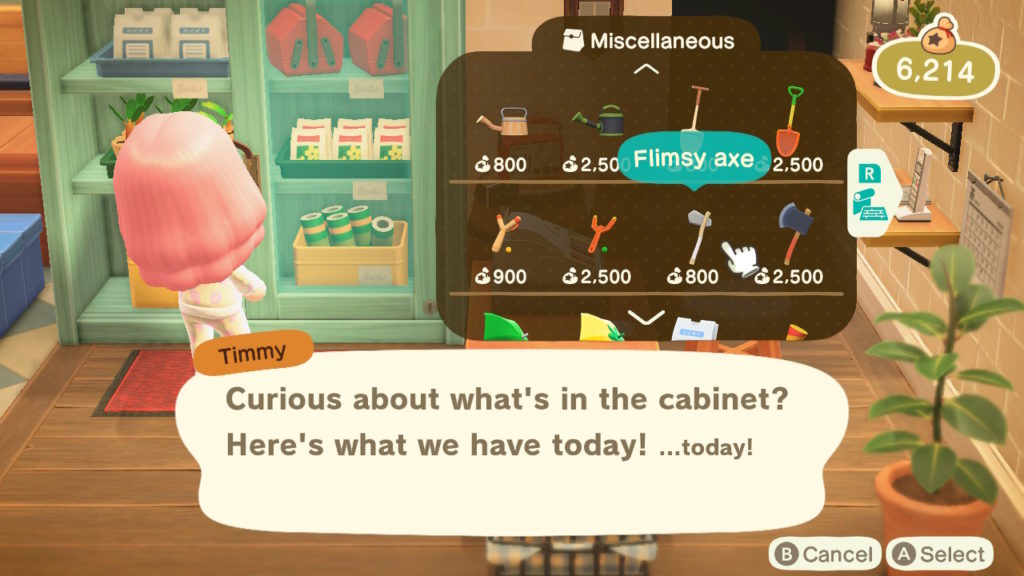
There are a whole bunch of new tools available for players to uses in Animal Crossing: New Horizons, and some of them are seriously cool. Some can be bought, whilst others will need to be crafted using DIY recipes. And so here’s every tool available in Animal Crossing: New Horizons.
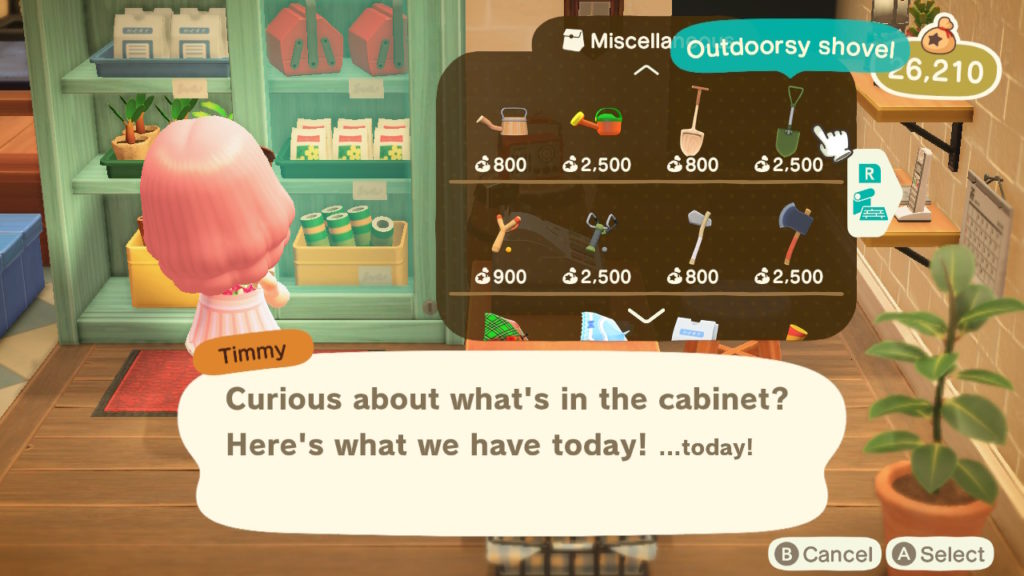
Axes:
- Flimsy axe – Can be crafted with 1x stone and 5x tree branches. Or alternatively, can be bought from Nook’s Cranny for 800 bells
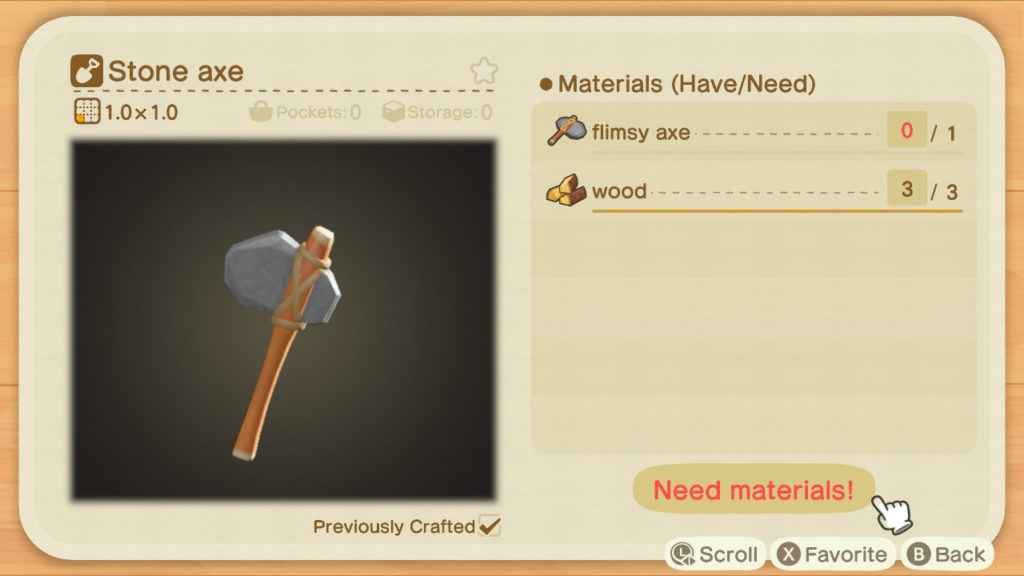
- Stone axe – Can be crafted with 1x flimsy axe and 3x wood (the stone axe is good for gathering wood as it won’t fell trees like the standard axe will after three blows.
- Standard axe – Can be crafted with 1x flimsy axe, 3x wood, and 1x iron nugget. Or alternatively, can be purchased at Nook’s Cranny for 2,500 bells.
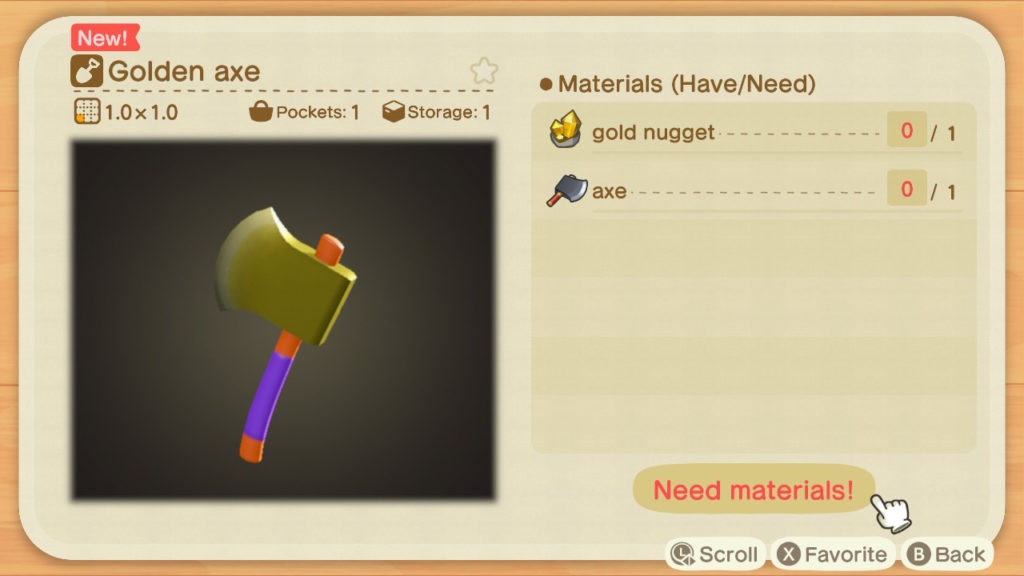
- Gold axe – Can be crafted using a recipe obtained after breaking 100 axes. It requires 1x standard axe and 1x gold nugget to craft.
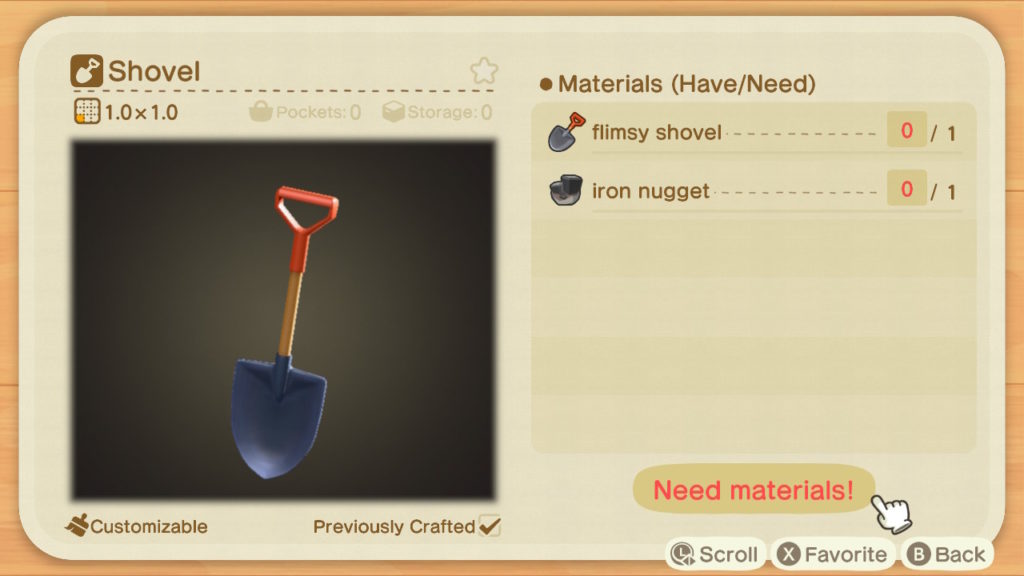
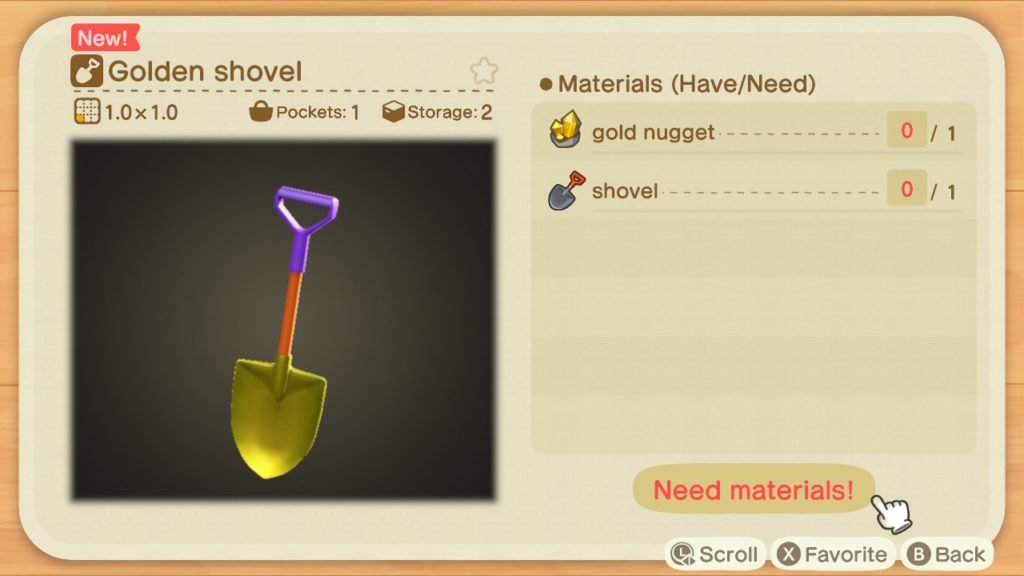
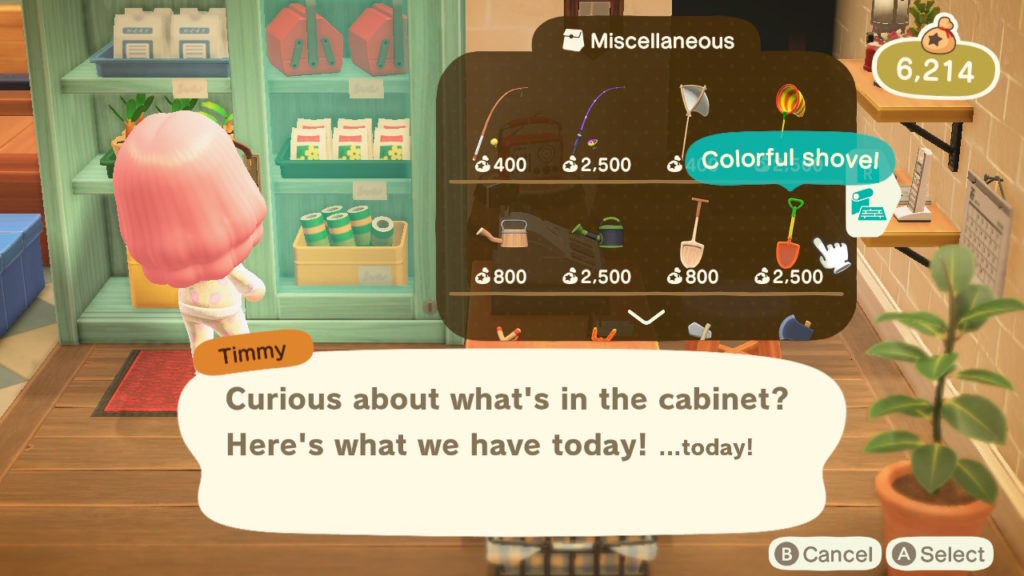
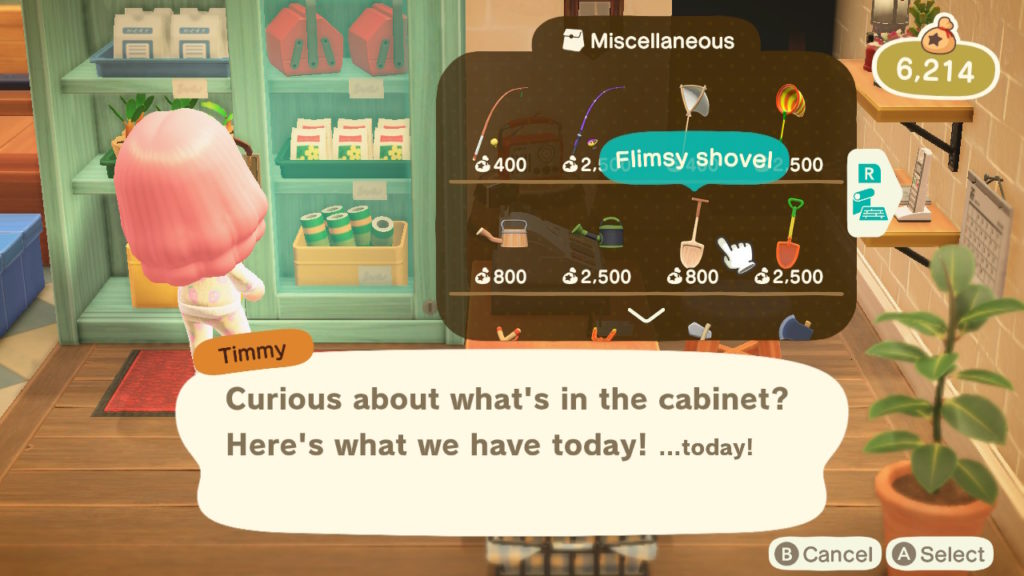
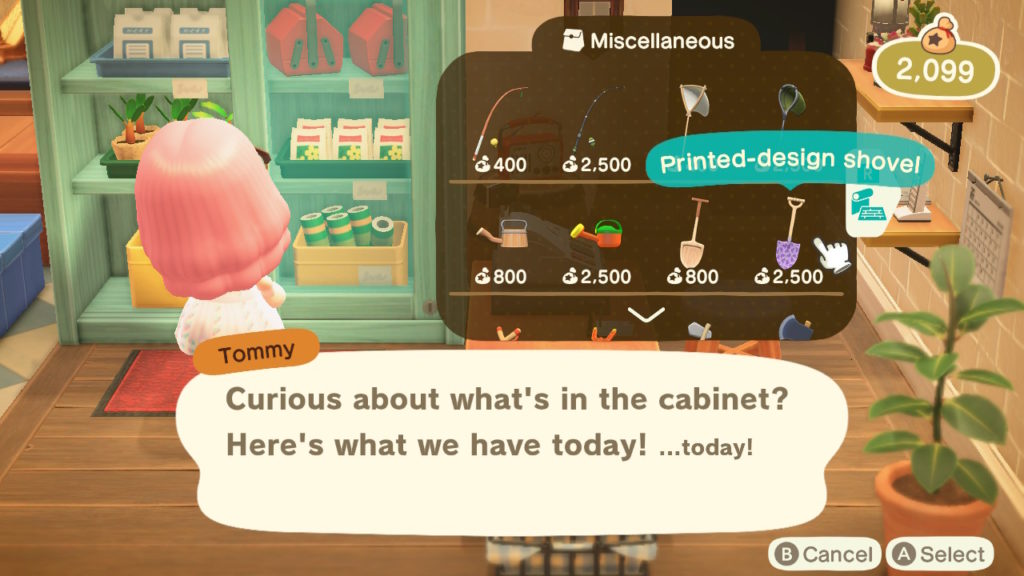
Shovels:
- Flimsy shovel – Can be crafted with 5x hardwood or can be purchased from Nook’s Cranny for 800 bells
- Standard shovel – Can be crafted with 1x flimsy shovel and 1x iron nugget
- Printed-design shovel – Can be purchased from Nook’s Cranny for 2,500 bells
- Colorful shovel – Can be purchased from Nook’s Cranny for 2,500 bells
- Outdoorsy shovel – Can be purchased from Nook’s Cranny for 2,500 bells
- Gold Shovel – Recipe can be obtained after helping Gulliver 30 times. Requires 1x regular shovel and 1x gold nugget to craft
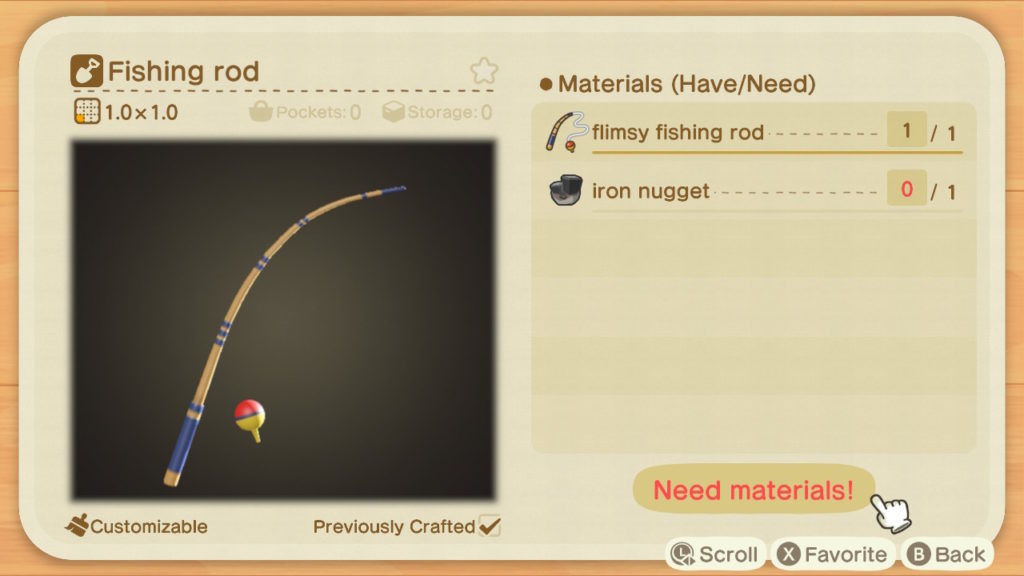
Fishing Rods:
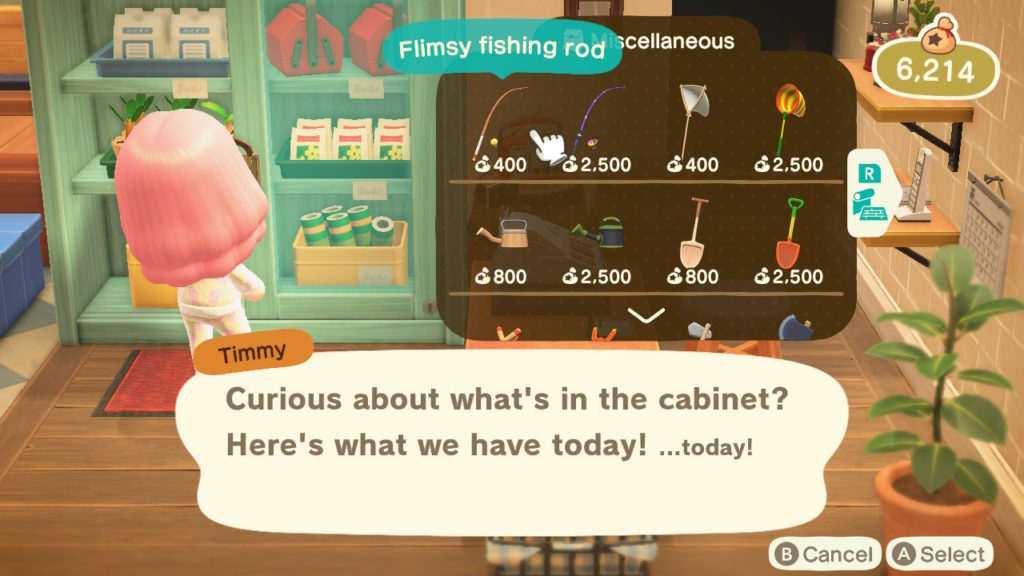
- Flimsy fishing rod – Can be crafted with 5x tree branches or purchased for 400 bells from Nook’s Cranny
- Standard fishing rod – Can be crafted with 1x flimsy fishing rod and 1x iron nugget
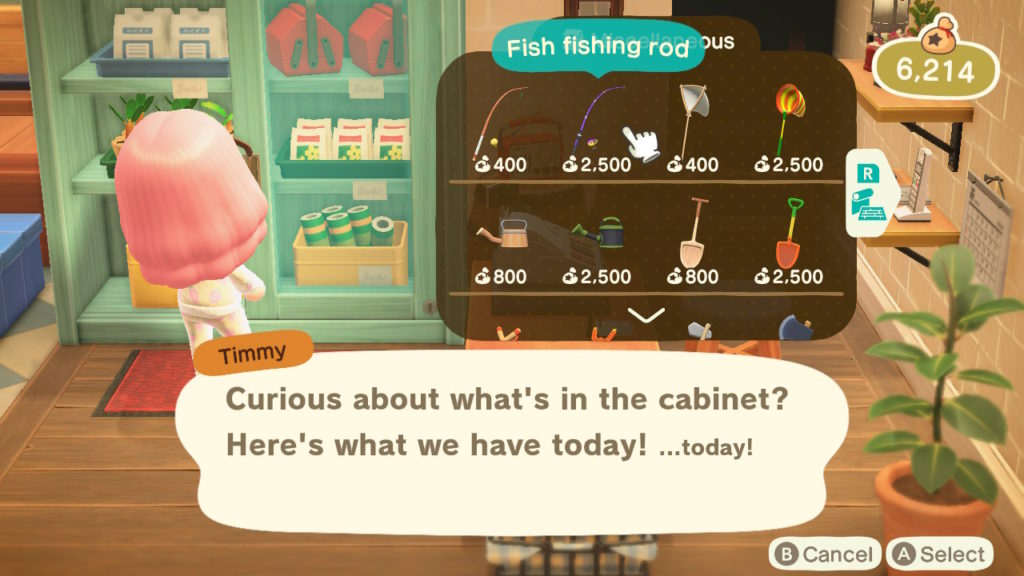
- Fish fishing rod – Can be purchased from Nook’s Cranny for 2,500 bells
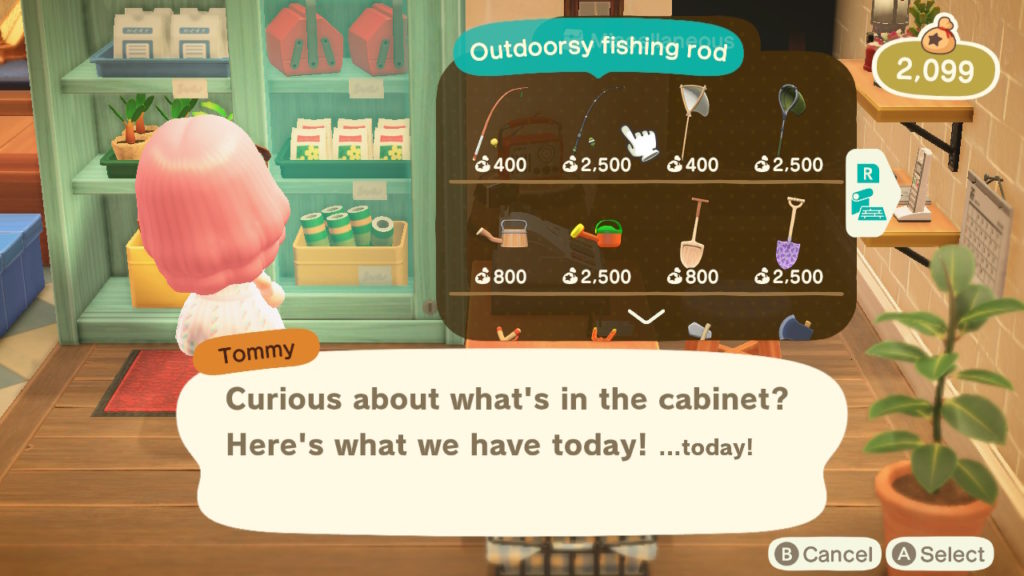
- Outdoorsy fishing rod – Can be purchased from Nook’s Cranny for 2,500 bells
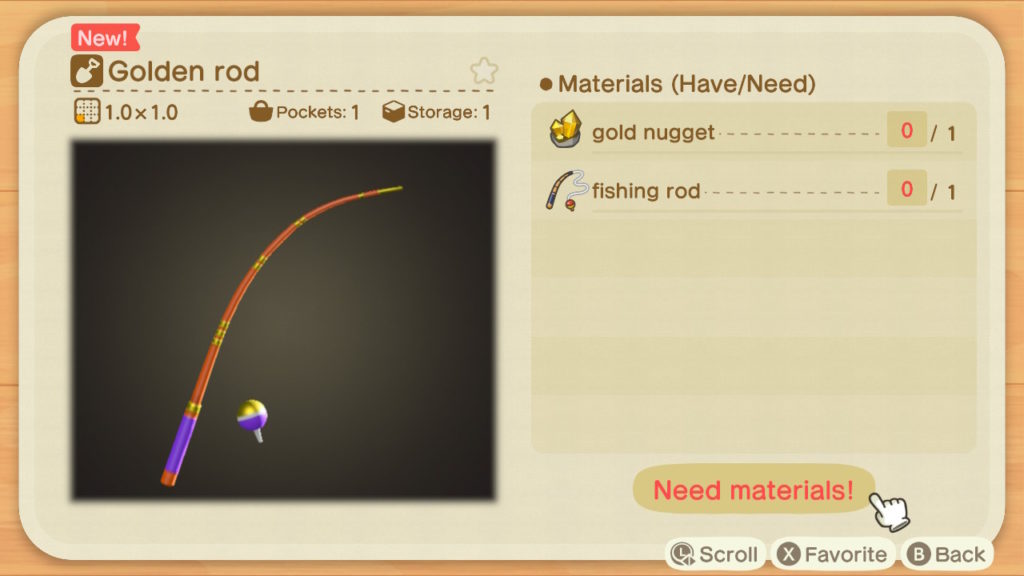
- Golden fishing rod – The recipe will be mailed to you once you have caught one of every fish in your Critterpedia. Requires 1x standard fishing rod and 1x gold nugget to craft
Slingshots:
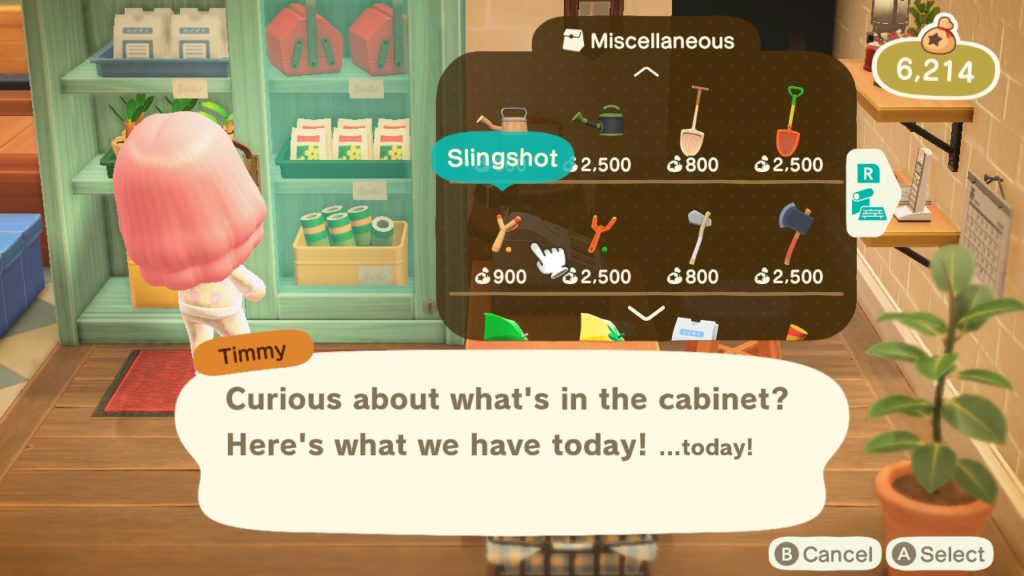
- Standard slingshot (can be crafted with 5x hardwood or purchased for 900 bells from Nook’s Cranny)
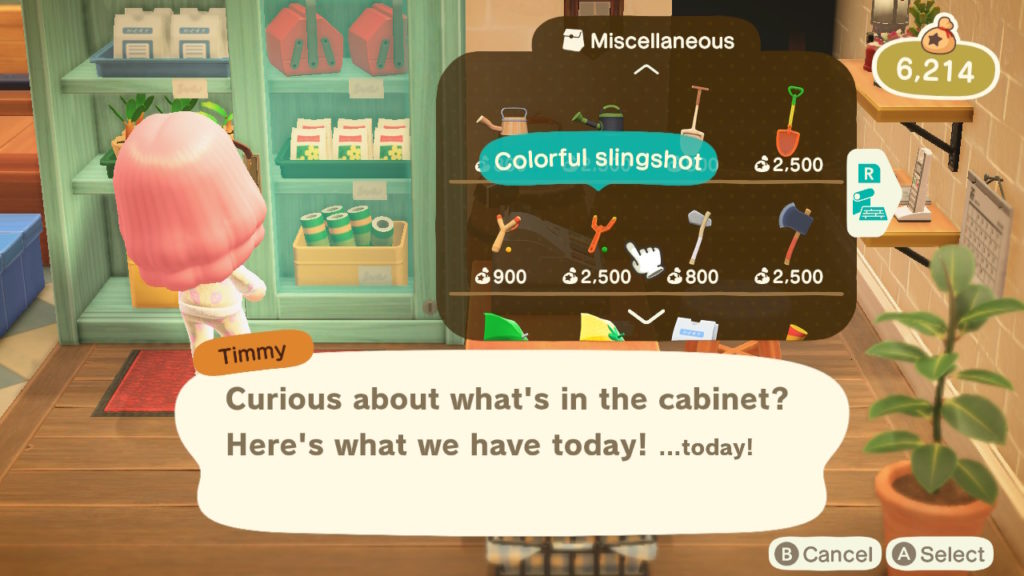
- Colorful slingshot (can be purchased for 2,500 bells bells from Nook’s Cranny)
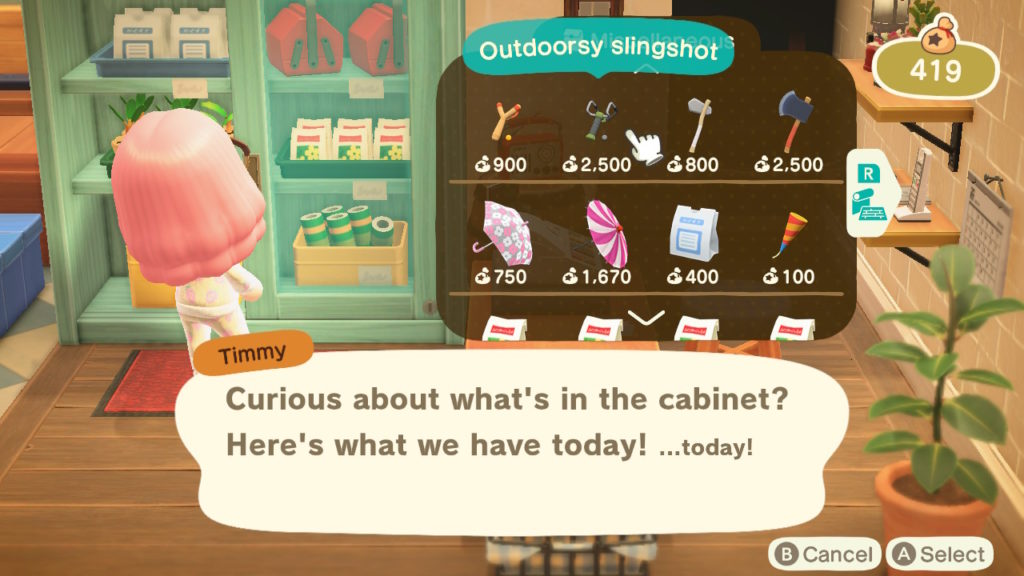
- Outdoorsy slingshot (can be purchased for 2,500 bells bells from Nook’s Cranny)
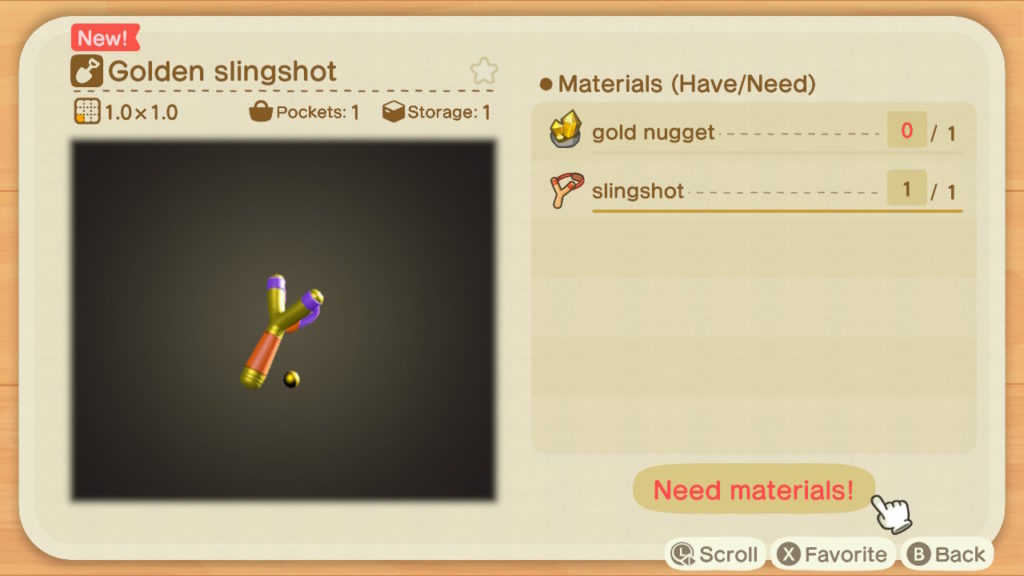
- Golden Slingshot (craftable using the DIY Recipe obtained from the 301st Balloon. Requires 1x standard slingshot and 1x gold nugget to craft)
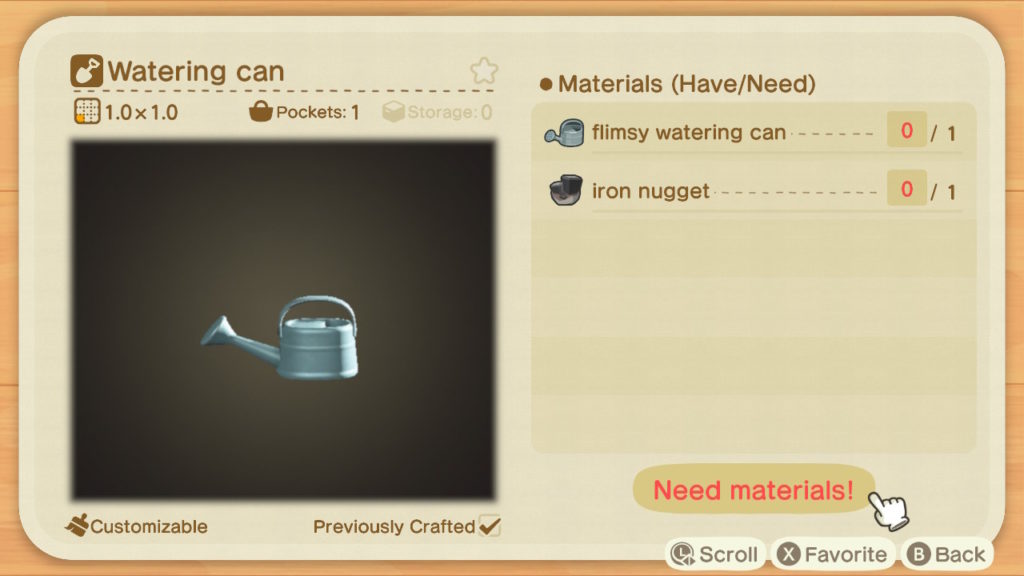
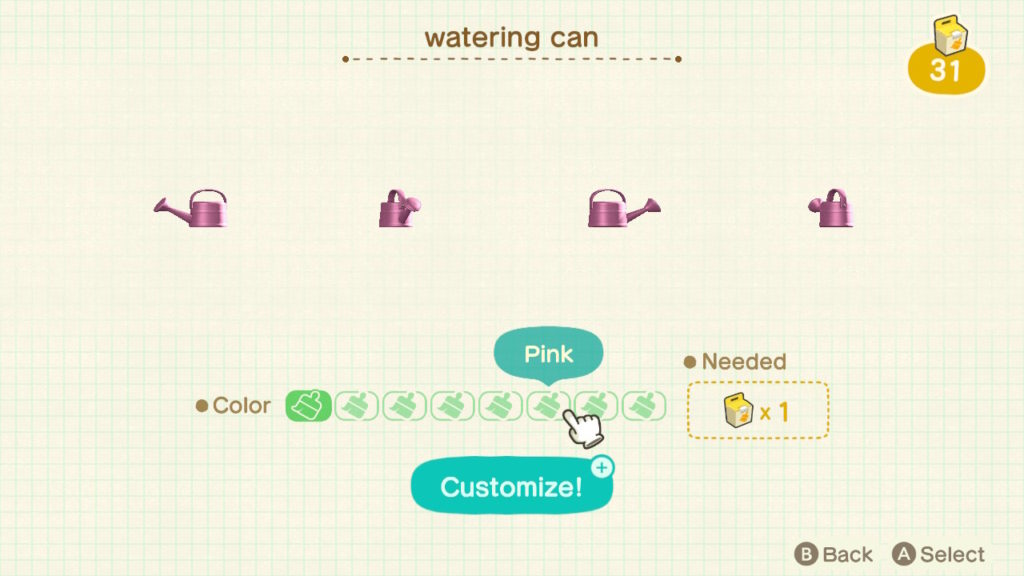
Watering Cans:
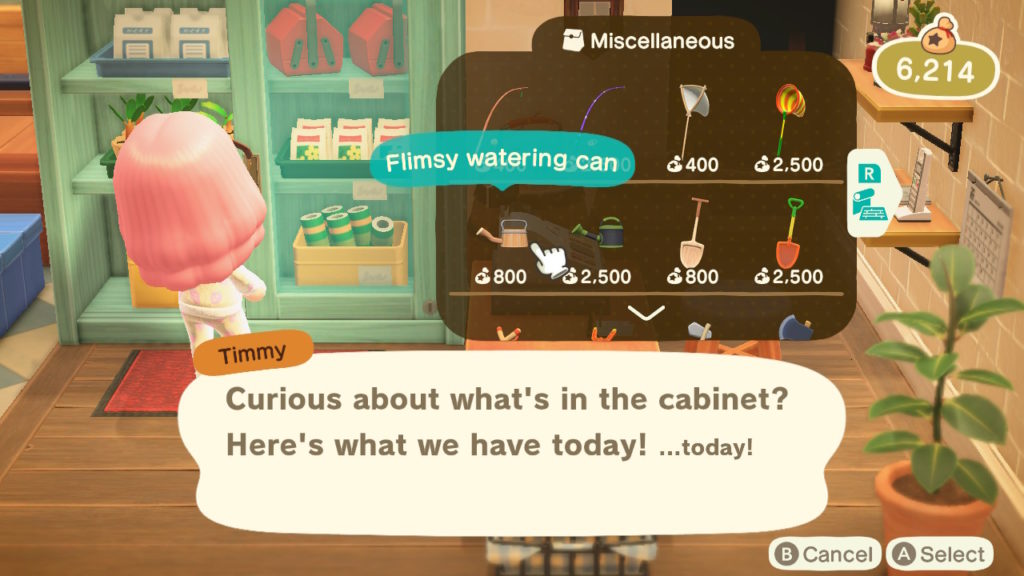
- Flimsy watering can (craftable with 5x softwood or bought from Nook’s Cranny for 800 bells)
- Standard watering can (craftable with 1x flimsy watering can and 1x iron nugget)
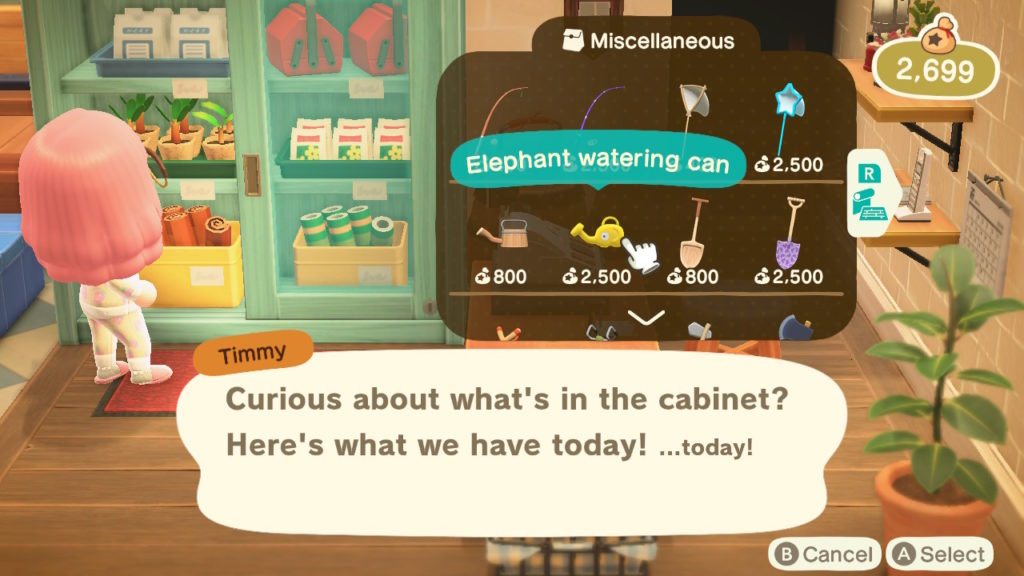
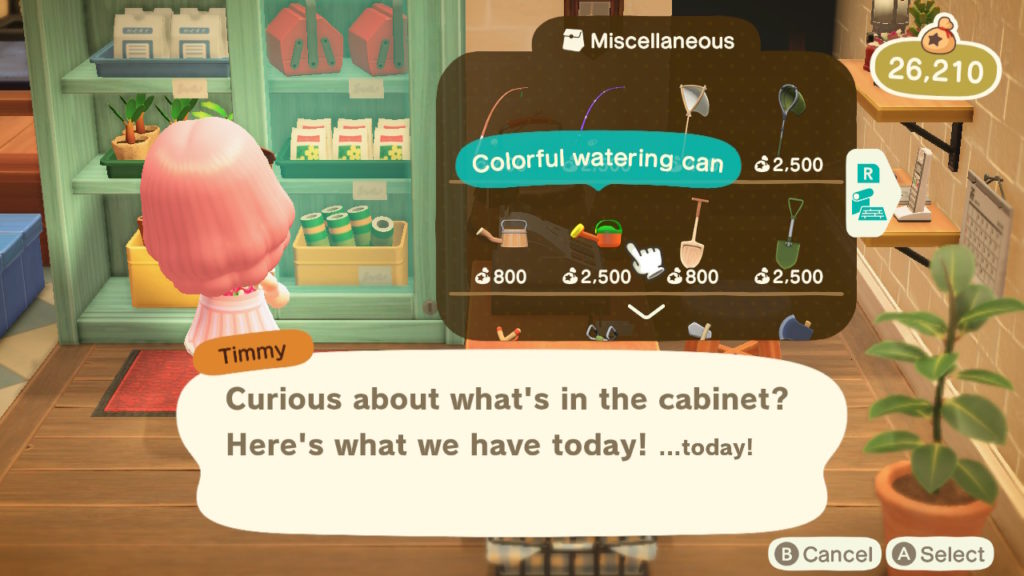
- Elephant watering can (Purchasable from Nook’s Cranny after first upgrade for 2,500 bells)
- Colorful watering can (Purchasable from Nook’s Cranny after first upgrade for 2,500 bells)
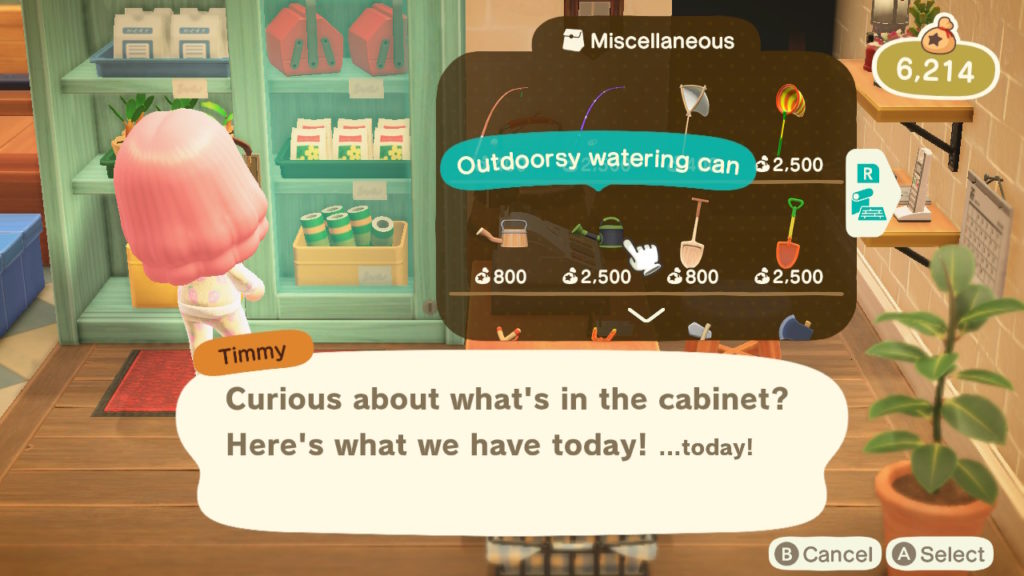
- Outdoorsy watering can (Purchasable from Nook’s Cranny after first upgrade for 2,500 bells)
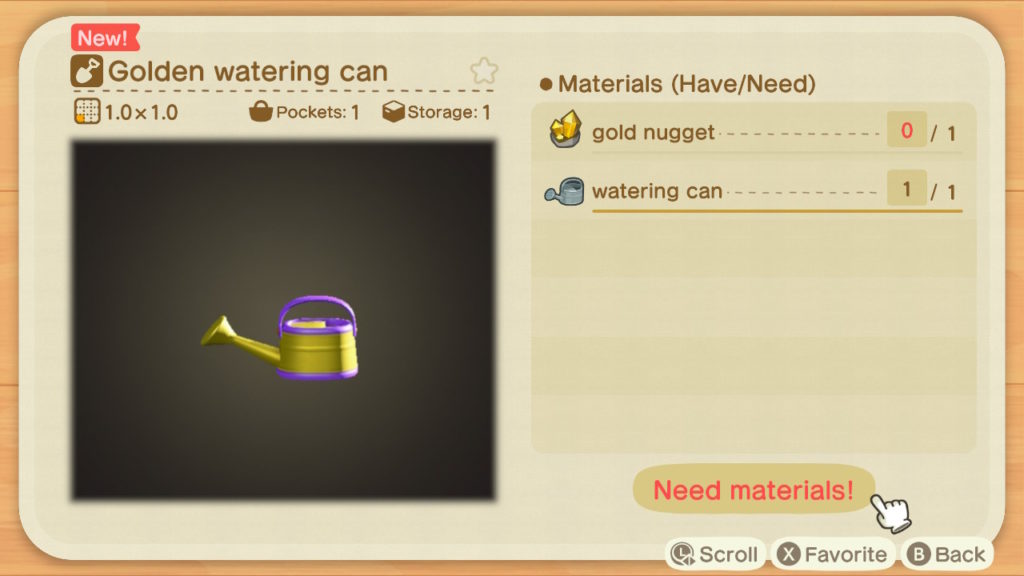
- Gold watering can (You will receive the recipe for it after having a perfect 5 star island rating for 15 days. Requires 1x standard watering can and 1x gold nugget to craft)
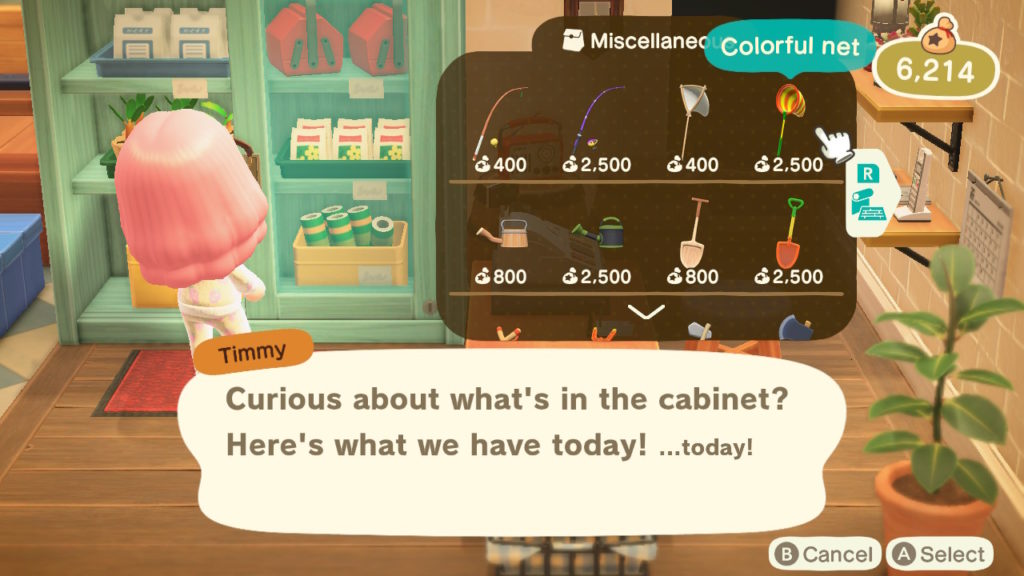
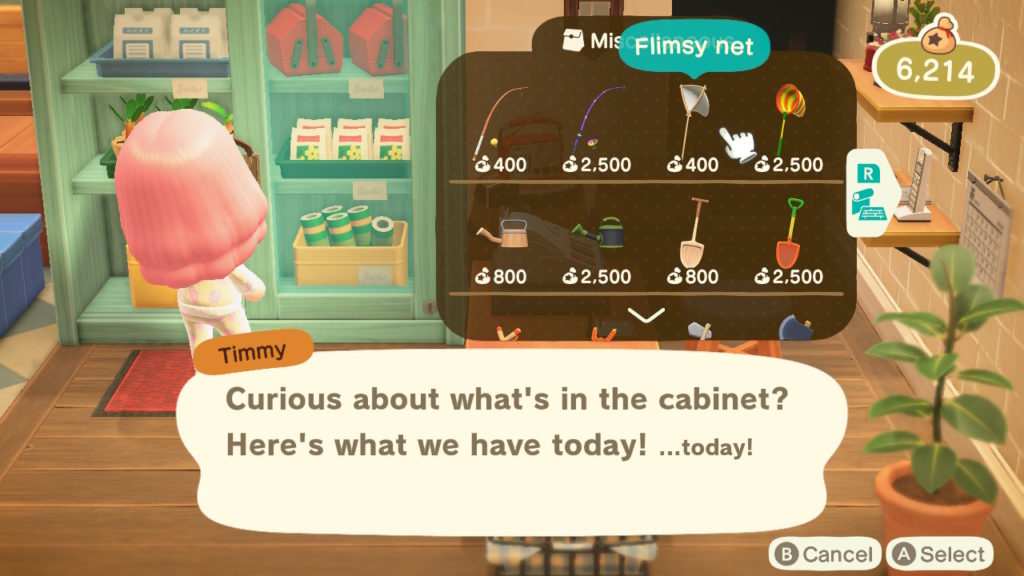
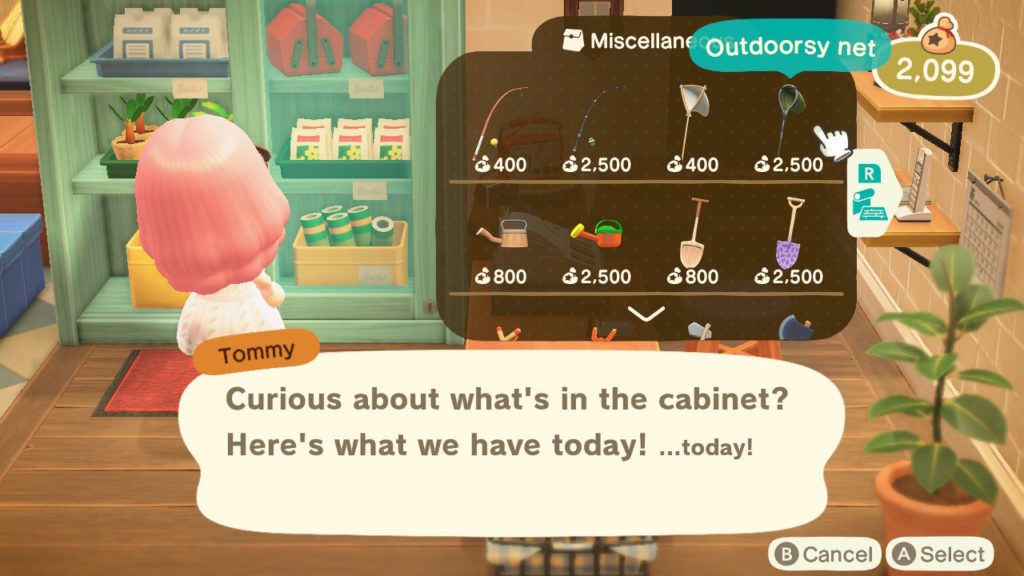
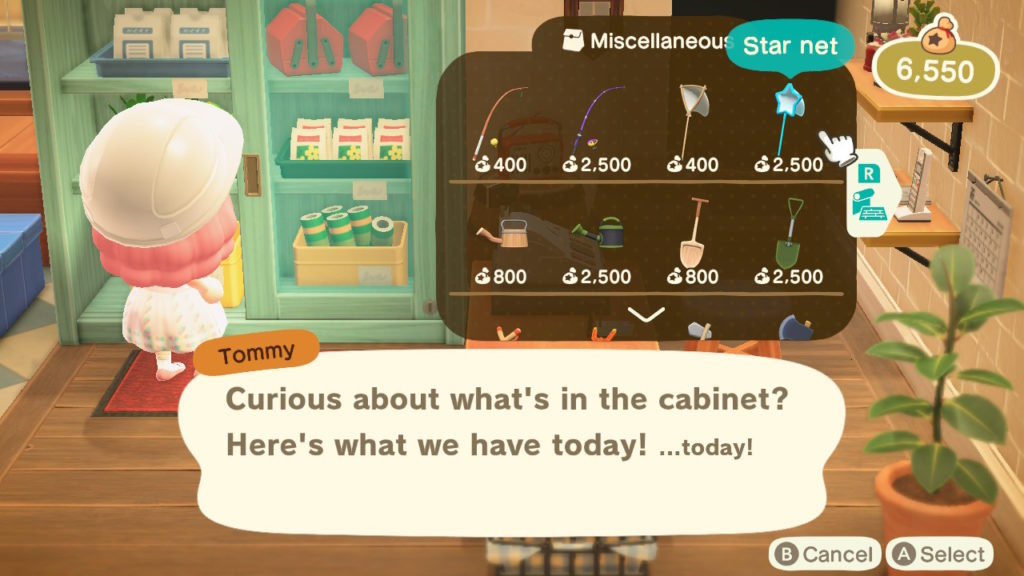
Bug Nets:
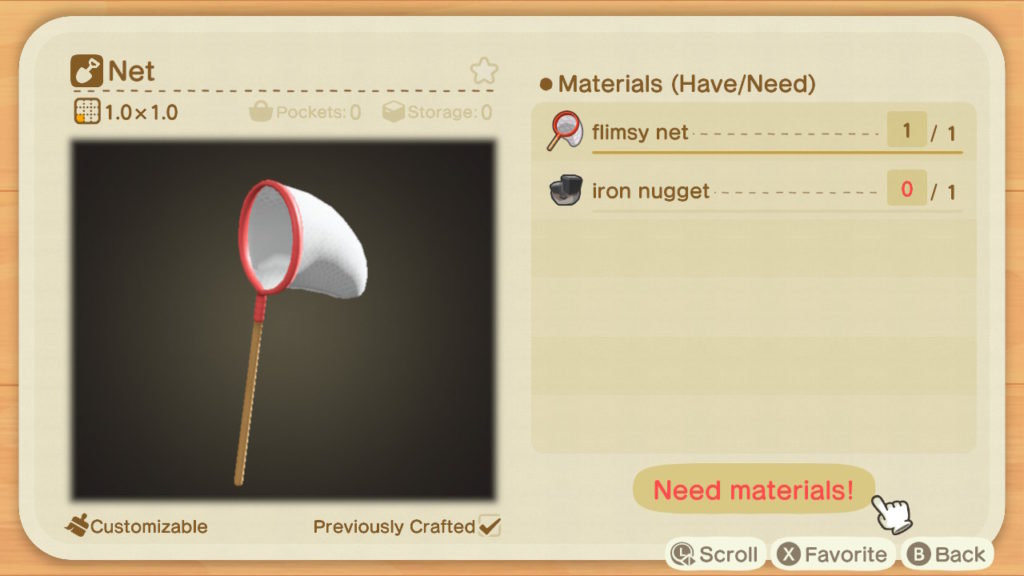
- Flimsy net – Requires 5x tree branches to craft, or can be purchased from Nook’s Cranny for 400 bells
- Standard net – Requires 1x flimsy net and 1x iron nugget to craft
- Colorful net – Can be purchased from Nook’s Cranny for 2,500 bells
- Outdoorsy net – Can be purchased from Nook’s Cranny for 2,500 bells
- Star net – Can be purchased from Nook’s Cranny for 2,500 bells
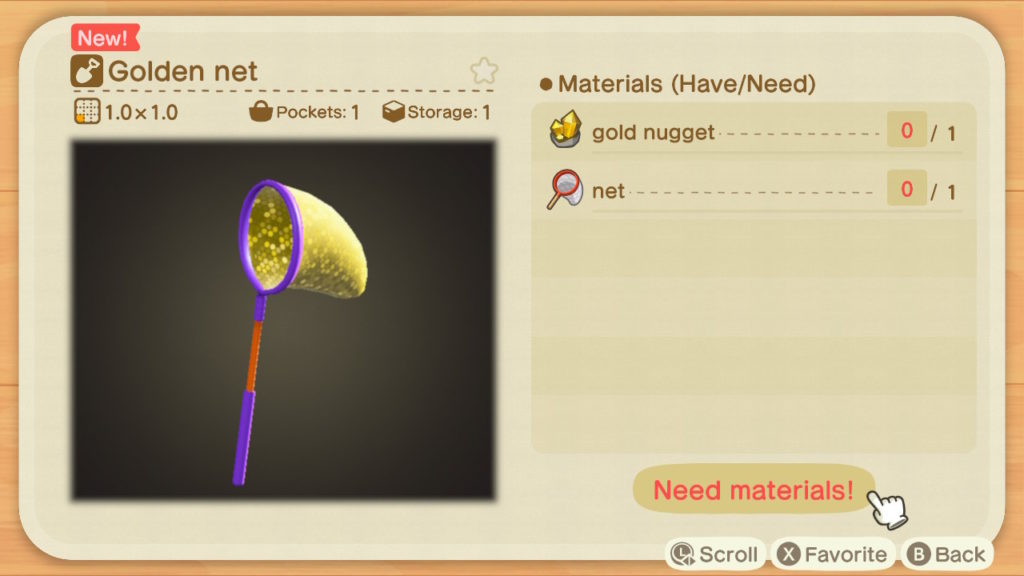
- Gold net – The recipe will be mailed to you once you have caught one of every insect in your Critterpedia. Requires 1x net and 1x gold nugget to craft
If you’re curious about the durability of different tools, why not check out this article.
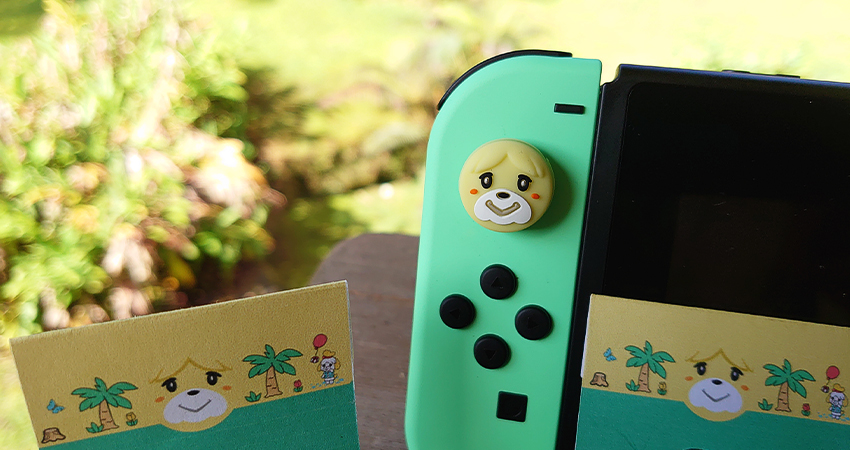
Animal Crossing New Horizons
You can still grab up these adorable Animal Crossing New Horizons Isabelle themed Thumbstick Grips for Nintendo Switch and Switch Lite!
- Apr 4, 2020
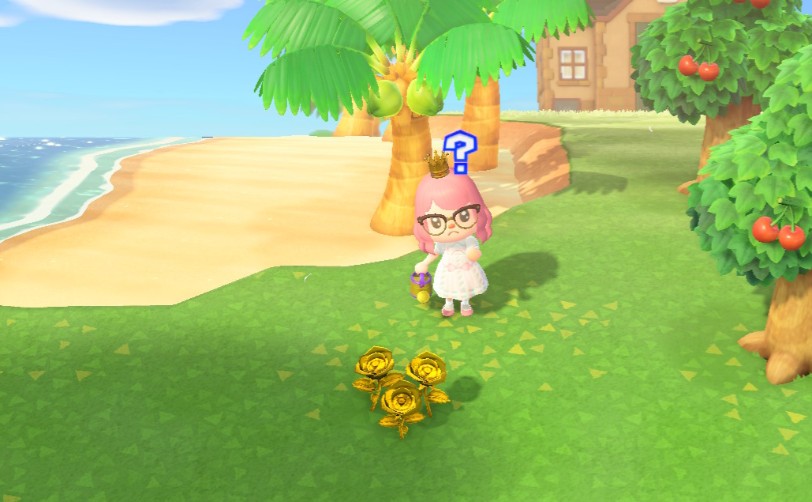
For all you magpies out there, you may be wanting to know if Gold Roses exist in New Horizons. They do exist, but like the 6 Golden Tools, they take some effort and patience to acquire. So let’s get to it, here’s how to get Gold Roses in Animal Crossing: New Horizons.
Obtaining The Golden Watering Can
You’ll first need the Golden Watering Can before doing anything else. You can get given the DIY recipe (which recquires one ordinary watering can and one gold nugget) to craft it after you have achieved a 5 star rating for your island.
How To Achieve A Five Star Rating For Your Island
Essentially, you will need to do the following to gain a five star rating:
- Plant lots of flowers and make sure you have the right amount of trees
- Get rid of any weeds growing on your island
- Have the maximum number of residents living on your island (10)
- Place a combination of bought and crafted items around your island
- Place a load of fences
You can keep checking in with Isabelle who will inform you of your island’s rating, and give you tips on how to improve it. Once you check in with her and she tells you that you have a five star rating, she will give you the DIY recipe for the golden watering can.
Obtaining Black Roses
In order to obtain Black Roses, you will need to cross-breed Red Roses in a mesh-like pattern (more on creating hybrids here). Plant enough Red Roses and you’ll get Black Rose hybrids.
Obtaining Gold Roses
Once you have obtained a few Black Roses, arrange them in the same mesh-like pattern you did in order to create the Black Roses. You will then need to water the Black Roses with your Golden Watering Can. The next day, you may see Gold Rose buds appear between your Black Rose hybrids. If you see any Gold Rose buds appear, they will grow into fully formed Gold Roses the day after that.
Gold Rose Selling Price
Gold Roses sell for 1,000 bells each, which probably isn’t worth the time and effort you put into obtaining them.
In order to see how the different roses should be placed, check out the YouTube video below for a full tutorial.
- Apr 1, 2020
Although notoriously difficult to acquire, golden tools have appeared in all the mainline Animal Crossing games. If you have been wondering whether they can be obtained in New Horizons, the answer is yes, but it will take time and effort to own them. Here’s how to get all 6 golden tools in Animal Crossing: New Horizons.
Rather than receiving an actual golden tool for fulfilling certain requirements, in New Horizons, players will be given recipes to craft them instead. The crafting materials required are one standard version of the tool, and one gold nugget. Gold nuggets can occasionally be obtained by hitting rocks with your shovel. Therefore it might be a good idea to stockpile as many of them as you can.
Additionally, whilst golden tools are more durable than regular tools, they will break eventually. But as you will have already learnt the recipe for the tool, the only difficult part is collecting gold nuggets.
Golden Net
In order to acquire the recipe for the Golden Net, you will need to catch every bug in your Critterpedia. You can kill two birds with one stone (or one bird with many bugs) by donating any new bugs you catch to the museum.
Golden Fishing Rod
You will receive the DIY recipe for the Golden Fishing Rod after completing the fish section of your Critterpedia. However, it will take time to receive this recipe, as the fish you catch will change with the seasons. Therefore, like with bugs, you can use this oppurtunity to donate any new catches to the museum.
Golden Shovel
In order to get the recipe for the Golden Shovel, you’ll have to help the pesky pun-filled Gulliver 30 times. The seagull sailor randomnly washes ashore from time to time. If you locate the 5 communicator parts necessary to fix his phone so that he can be rescued, he will send you a reward in the mail.
Golden Slingshot
The exact method required to attain the recipe for the Golden Slingshot is currently unknown. In previous games, a player could receive a Golden Slingshot by shooting down a certain number of balloons. Whilst unconfirmed, it is thought that the ‘It’s raining treasure’ Nook Miles achievement for shooting down 300 balloons will earn you the recipe.
Golden Watering Can
To receive the recipe for the Golden Watering Can, you need to achieve a perfect 5-star rating for your island and speak to Isabelle. This involves having a sufficient number of happy residents. Additionally, you will need to improve your island’s appearance by pulling weeds, planting flowers and trees, completing projects etc. You can speak with Isabelle at Residents Services to find out your island’s rating, and to get tips on how to improve it.
Golden Axe
In order to obtain the recipe required to craft the Golden Axe, you will need to have destroyed over 100 axes. The destruction of flimsy axes, stone axes, and regular axes all contribute towards acquiring this recipe. Therefore if you’re dead-set on acquiring the golden axe, use flimsy axes where possible, as they are the easiest to break.
- Mar 31, 2020

Kicks is a skunk character who first appeared in Animal Crossing: City Folk. If seen in the city, he would shine your shoes for 500 bells, which would change them. He then made a reappearance in Animal Crossing: New Leaf. Here, he ran a shoe shop which would open after players had spent 8,000 Bells at the Able Sisters, and lived in the town for ten days. You may therefore be wondering whether he will make an appearance on your island. He will, and here’s how to meet Kicks in Animal Crossing: New Horizons.
When And Where He Appears
The only requirement for Kicks to appear on your island is to have upgraded the Residents Services tent into a building. From then onwards, he can be found in the plaza once a week, where he has his own stall. Like Label, the day of the week that he appears is random. Additionally, it seems that he has no intention of setting up a shop like the Able Sisters. Instead, he can be considered a travelling merchant like Sahara and Daisy-Mae (minus the wandering around).
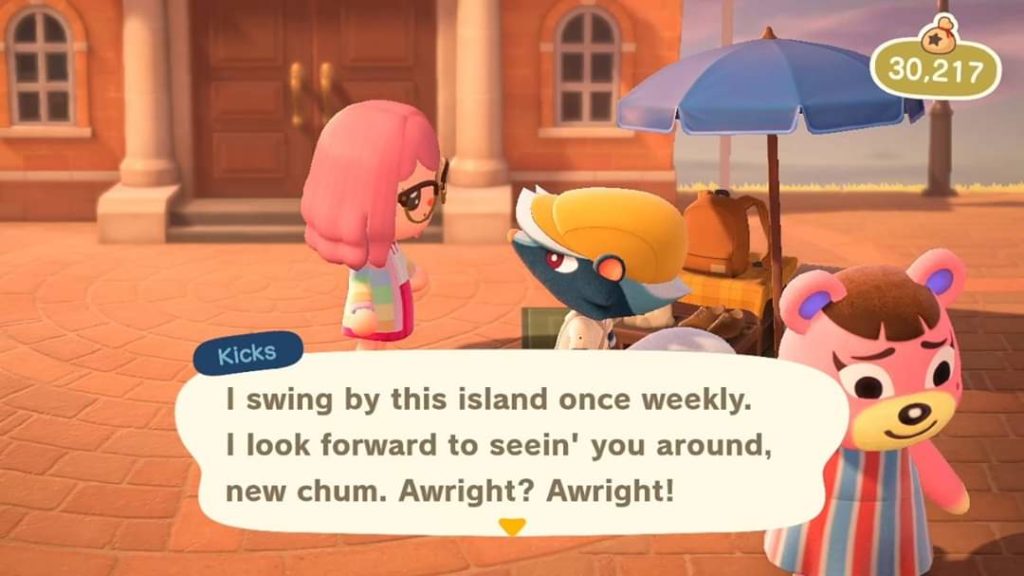
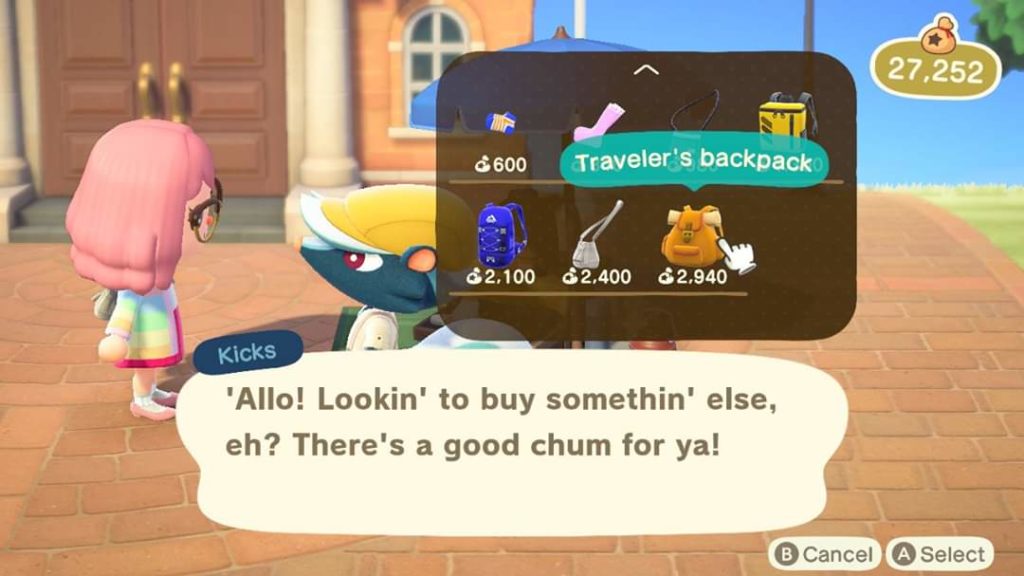
What He Sells
At his stall players can buy shoes, socks and leggings. These are all clothing items that can also be bought at the Able Sisters store. However, you’ll definitely want to check out his shop whenever you see him in the plaza. This is because he also sells backpacks and bags, which are items that can’t be bought from the other shops.
- Mar 29, 2020
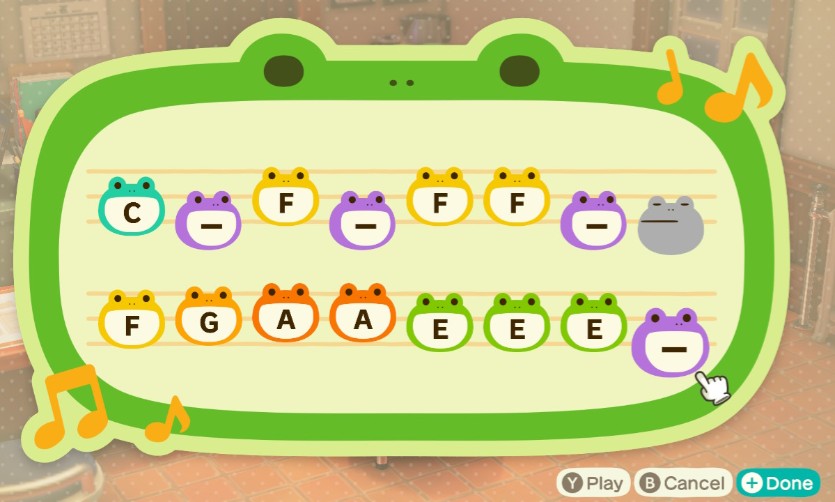
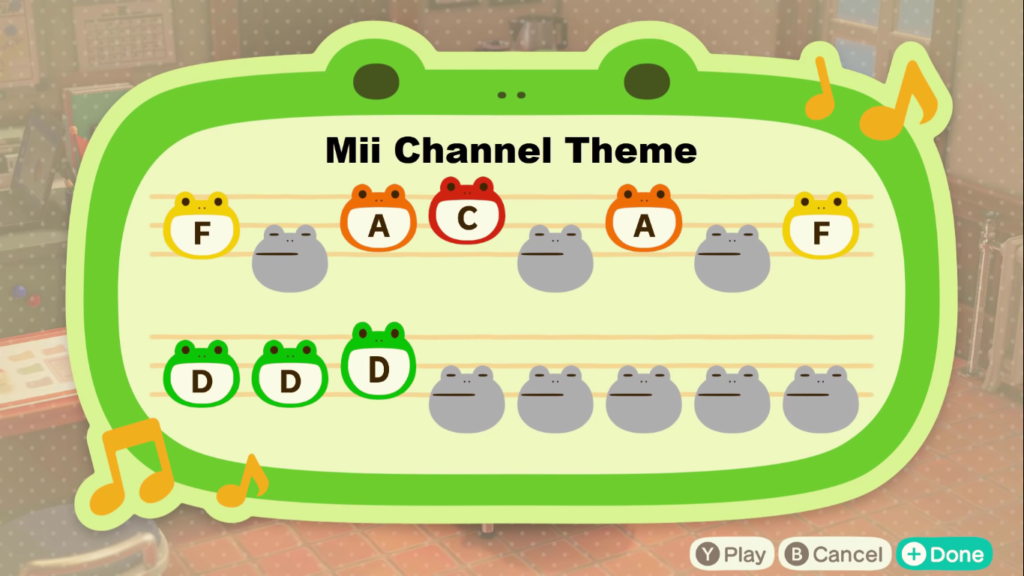
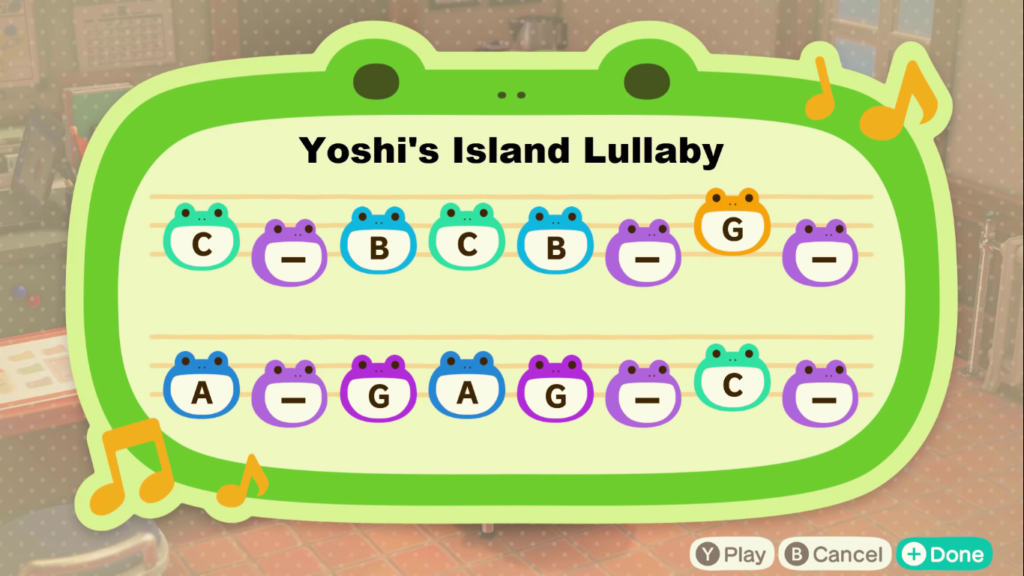
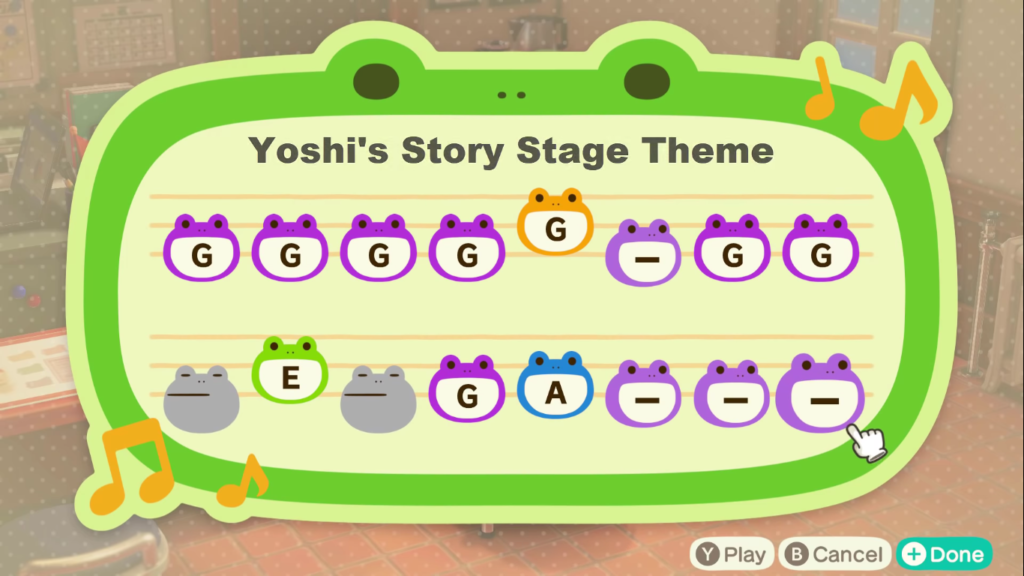
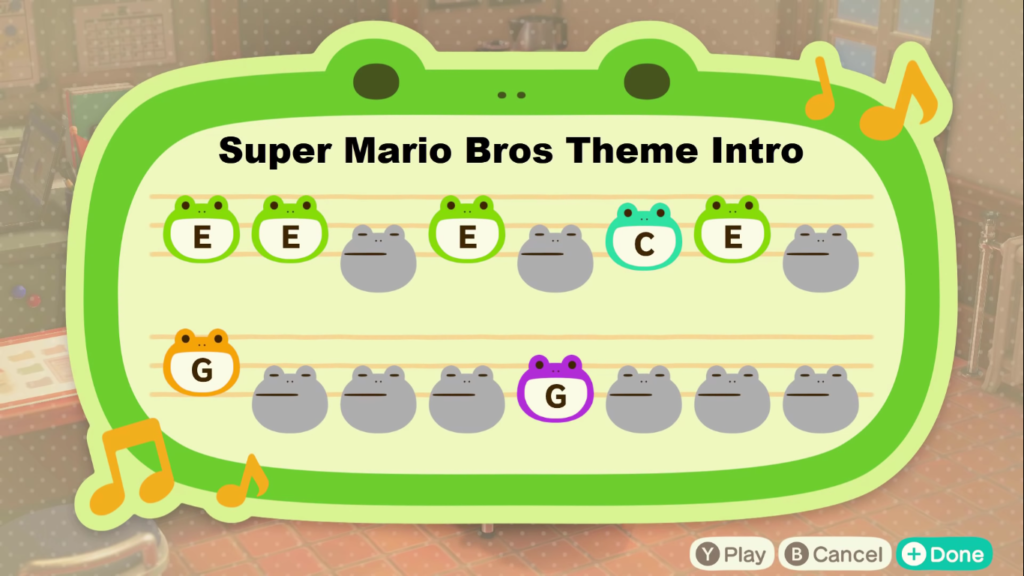
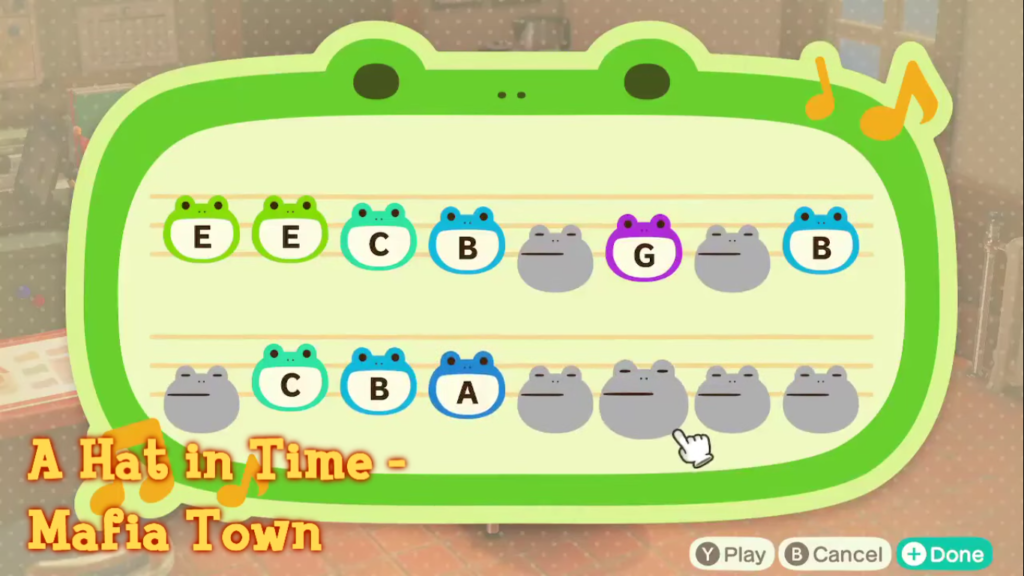
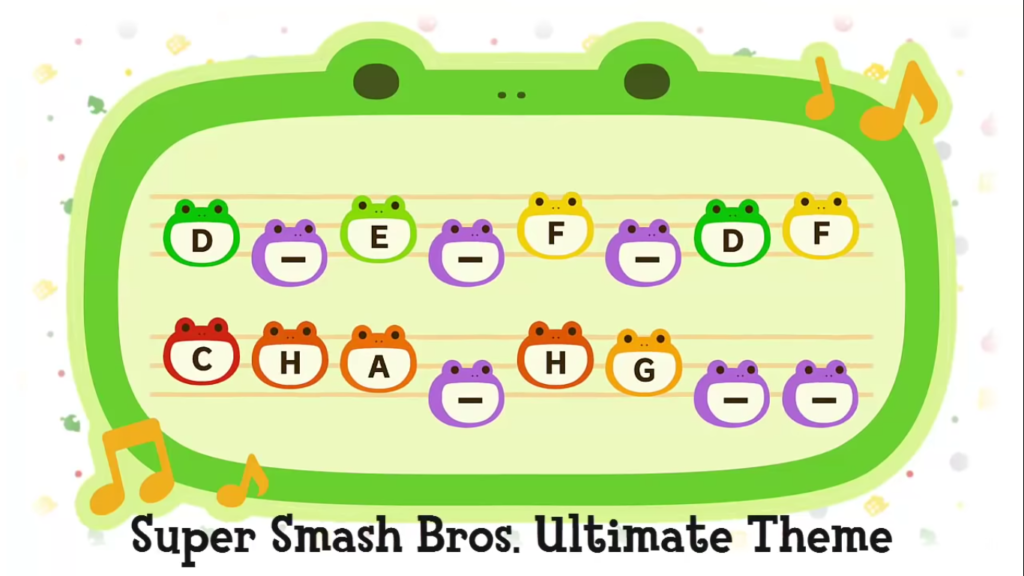
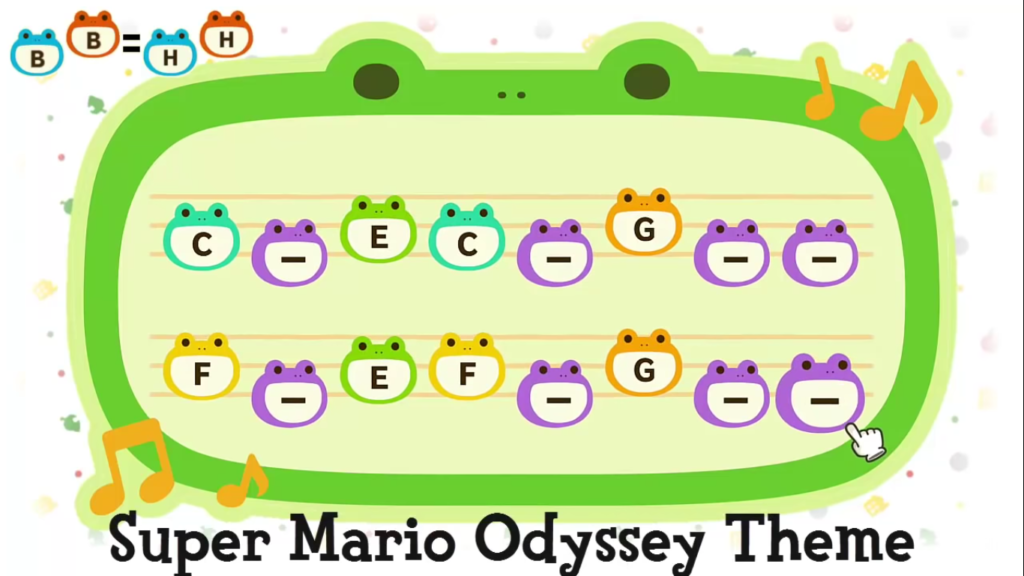
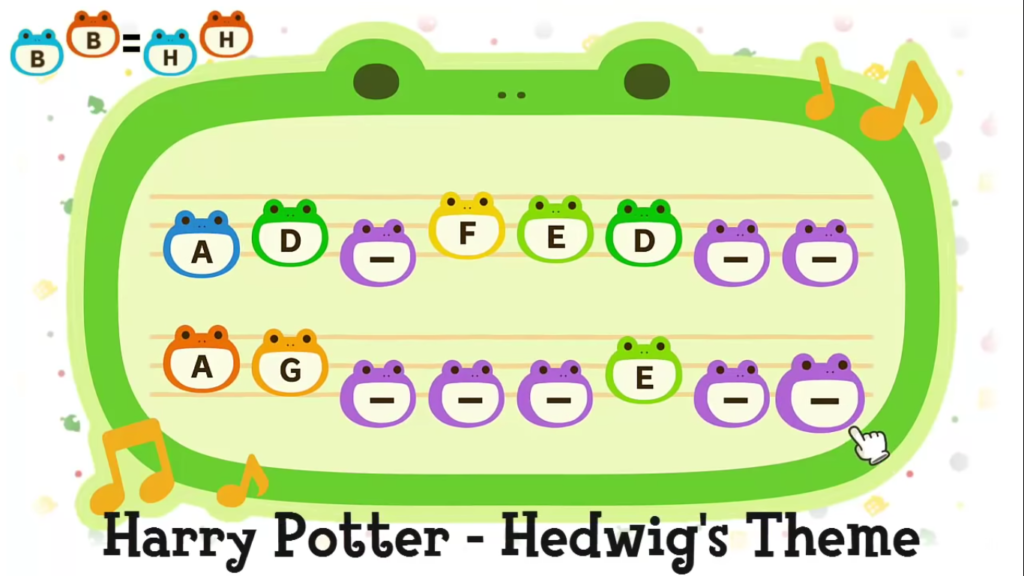
Choose one of these adorable tunes for your island and watch villagers perform your new town melody.
Most people have probably unlocked the Residents Services building in New Horizons by now. Once you have the building, you can speak to Isabelle in order to change your island tune. Just like town tunes in previous games, you can only create short melodies.
But don’t worry if you are struggling to create an island tune that you are happy with. There are a bunch of awesome Town/Island Tunes that can be found online.
Additionally, there is a website where you can create and share island tunes called NookNet.
However, to save you the trouble of browsing, Here are 25 Great Animal Crossing: New Horizons Island Tunes.


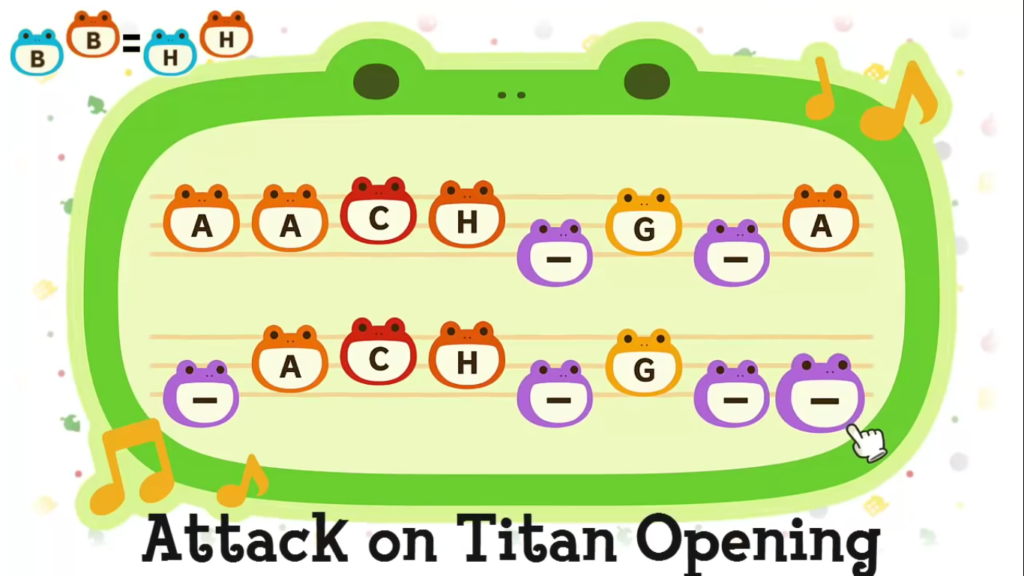

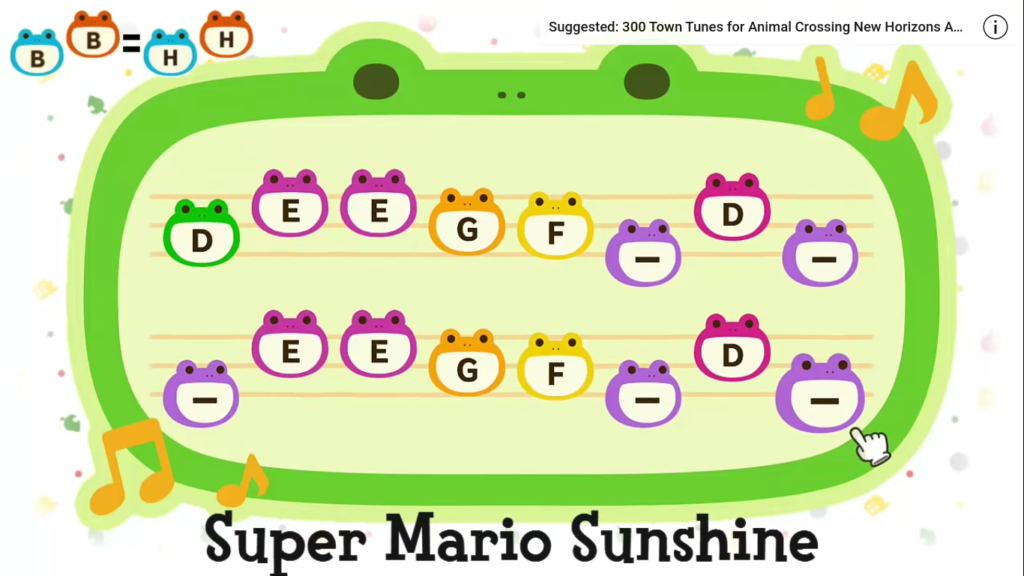
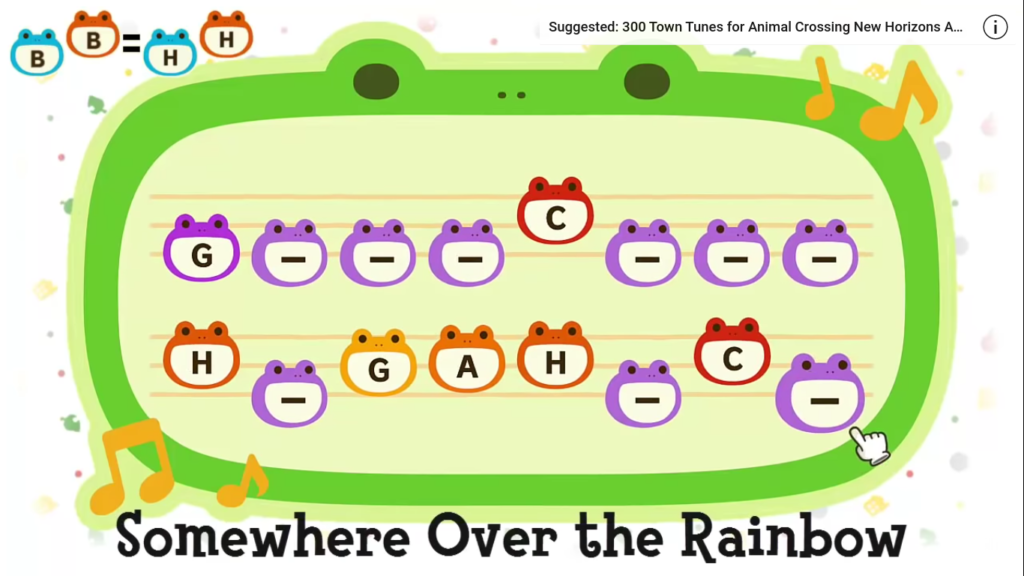
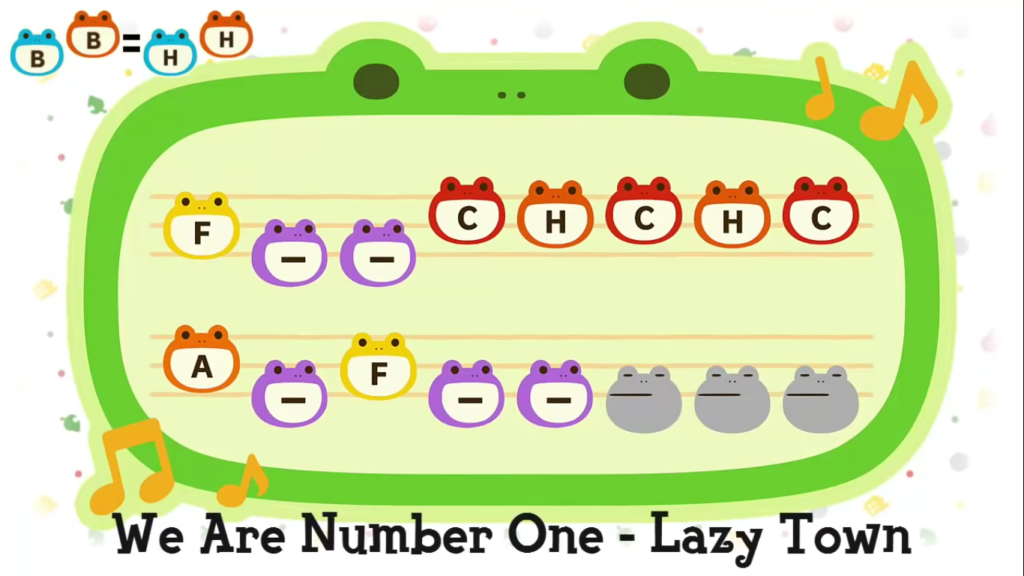
If you enjoyed these creative New Horizons island tunes, why not check out the creative clothing people have been designing in the game here.
- Mar 25, 2020
Animal Crossing: New Leaf was the first game in the franchise to offer furniture customization. This awesome feature lives on in New Horizons, where clothing customization is also possible. Whilst not available immediately, players will unlock the ability to customize furniture as they progress through the game.
If you wish to jazz up your furniture, but are unsure how, don’t fret, as here’s some guidance on how to customize furniture in Animal Crossing: New Horizons.
How To Unlock Furniture Customization
There are a few requirements that players must fulfil before being able to customize furniture. You must complete the museum and invite three new residents to your island, before Tom Nook will invite you to participate in a customization workshop.
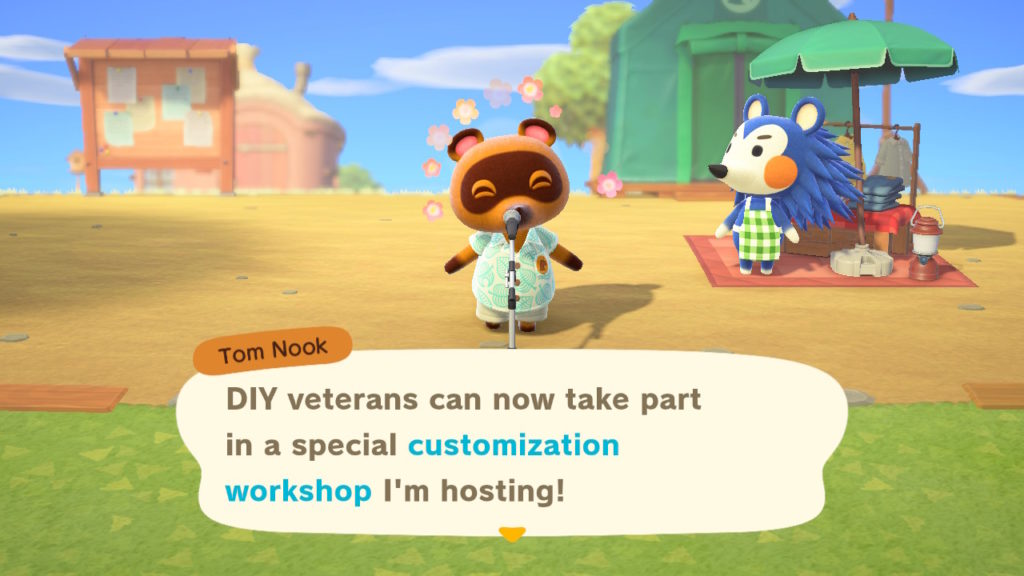
The workshop will take place at Residents Services, where you must craft a wardrobe. Tom Nook will give you the recipe required to craft it. The recipe for it requires 12 pieces of wood. Once you have crafted it, you will then be able to customize furniture.
What Is Required In Order To Customize Furniture
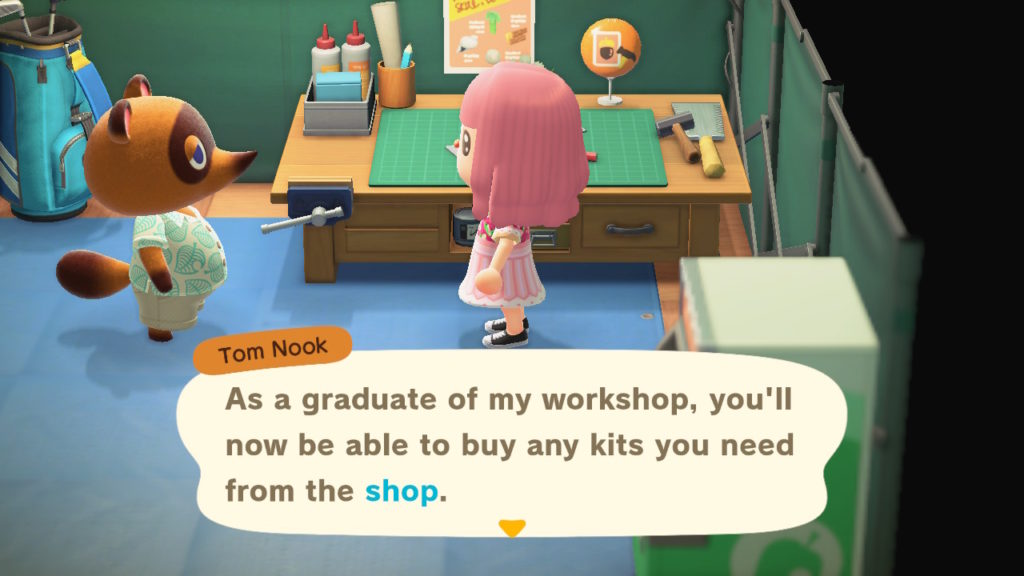
In order to customize furniture, you will need a few customization kits, a piece of furniture that you can customize, and access to a workbench.
You will receive 50 Customization Kits from Tom Nook after completing his customization workshop. If you need any more customization kits, you can buy them from either Nook’s Cranny, or if you have not yet unlocked the store, you can buy them from Timmy in the Residents Services tent instead. They cost 600 bells each to purchase.
How To Customize Furniture
Once you have a piece of furniture that you want to customize, and some customization kits in your inevntory, head to a workbench and interact with it. When asked ‘Should I craft comething?’ select the ‘Customize something option’. You can then select the furniture that you wish to customize, and will be taken to the customization screen. Here, you will be able to change the colour of items.
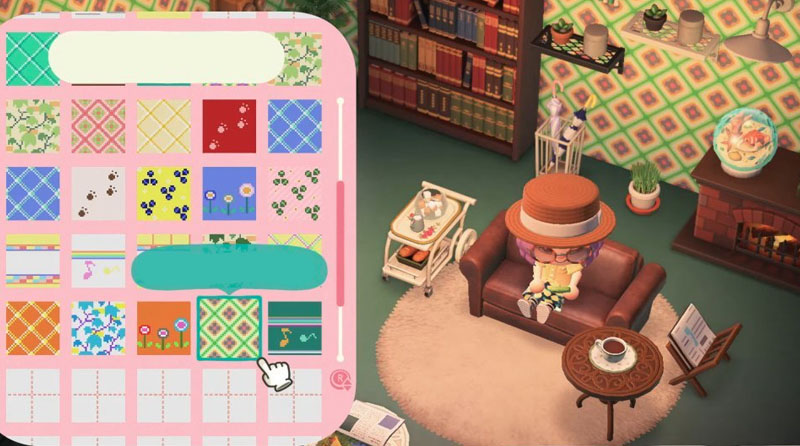
With some types of furniture, such as beds and tables, you will also be able to change the fabric of the item. There are different coloured fabrics for you to choose from. However, you can also customize fabric using your own designs or designs obtained using QR codes. You can learn more about QR codes in Animal Crossing: New Horizons here.
Fun Fact: You can also customize tools!
- Mar 23, 2020
Even the smallest of details and features can make a game considerably better. Before the release of New Horizons, I published two articles (which you can read here, and here) about the amazing attention to detail players could look forward to. Now that the game is here, we can truly appreciate the effort that Nintendo has put into the game.
I’ve covered some of the more obvious elements of the game, but I’ve also noticed some rather neat little things that you might not know. Here are our favourite cool little things that you can do in Animal Crossing: New Horizons.
Hop Over Holes And Small Parts Of Ponds
I don’t know why I found this so exciting. But in Animal Crossing: New Horizons, players can hop over holes and the smaller parts of ponds. To do this, you simply press the joystick in the direction of the hole/small area of water that you wish to hop over. ?️
Sell Weeds And Use Them To Craft Items
Weeds are not as much of a pest as they were in previous games. In fact, you can sell them to the Nooklings (which will also earn you Nook Miles) and use them to craft items such as the Leaf umbrella or Hay bed. ?
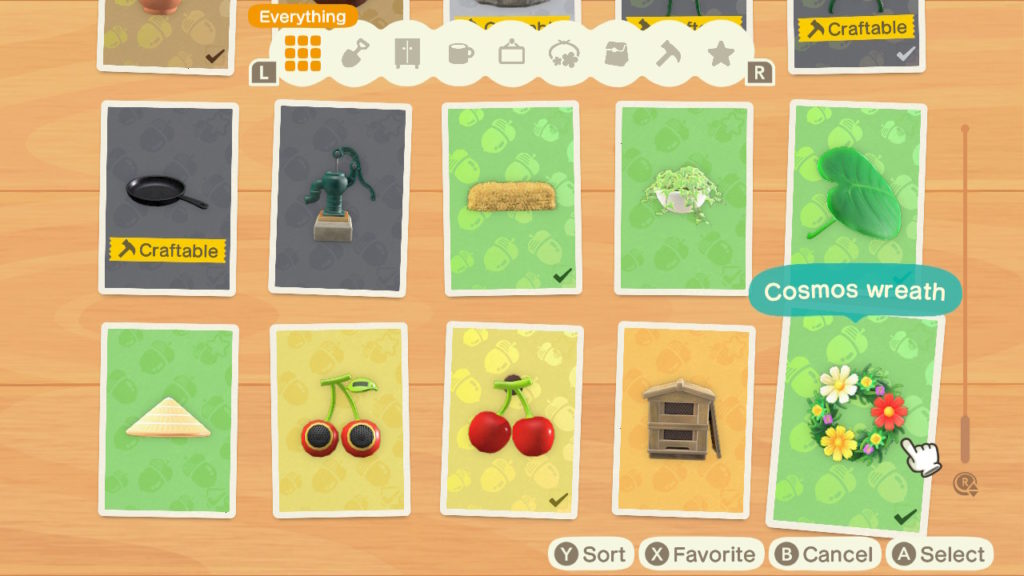
Flower Power
Tom Nook will give you a recipe for a flower wreath after a few days of gameplay, and this only requires 3x yellow, 3x red and 3x white cosmos to craft. ‘Pretty’ neat huh? ?
Are You Tired Of Tires?
In previous games, any tires you reeled in whilst fishing were worthless and considered trash. However, if you ‘catch’ a tire whilst fishing in New Horizons, you will then get the recipe for the ‘Tire toy’ which requires a tire to craft it. ?

Uproot By Eating Fruit
This might not be such a ‘little’ feature, but it is rather cool and impressive nonetheless. By eating a piece of fruit, you can literally dig up an entire tree, store it in your inventory, and relocate it. ?
Let There Be Light
If you catch a fish, you can display it in a tank in your house. However, if you face the fish tank and press the A button, you can turn on a light in the tank. To turn it off, you simply press A again. ?
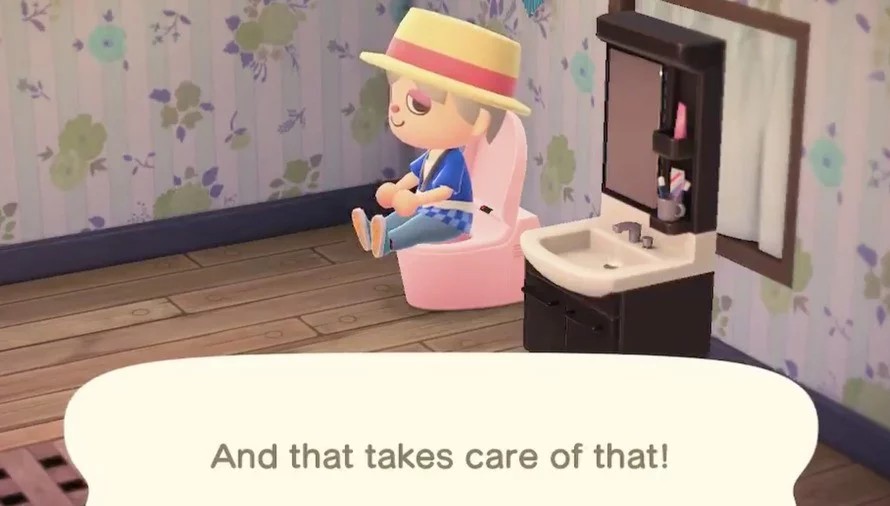
Use A Toilet To Rid Yourself Of Any Fruit You’ve Eaten…
Many internet users initially thought that this was a joke. Nope. If you sit on a toilet after eating fruit, it will get rid of your fruit-powered strength. Simply put, you can essentially poop in New Horizons. ?
Darling Leave A Light On For Me…
If you’ve left a light on inside your house, it will be visible from outside which is pretty cool. However, it’s a good job that Tom Nook doesn’t require you to pay utility bills.. ?